Quick Guide to AWS (Amazon Web Services) IAM (Identity and Access Management)

The role of security is inevitable at any level in the world of software. AWS IAM (Identity and Access Management) is the backbone of security in AWS. With IAM, Authentication and Authorization are handled effectively .
Authentication: Validates that the user is who they claim to be(i.e., that the right user is signed in.)
Authorization: Verifies that the signed-in user has the right permissions to access particular resources.
Key components of IAM:
Users
Groups
Roles
Policies
The person who signs up and creates the AWS account gets the root user access. However, it’s not advisable to use root user credentials to perform required tasks.
Therefore, an IAM user account is created .
When a root account is created, the root user creates an IAM user account (for themselves) and assigns admin permissions to the user.
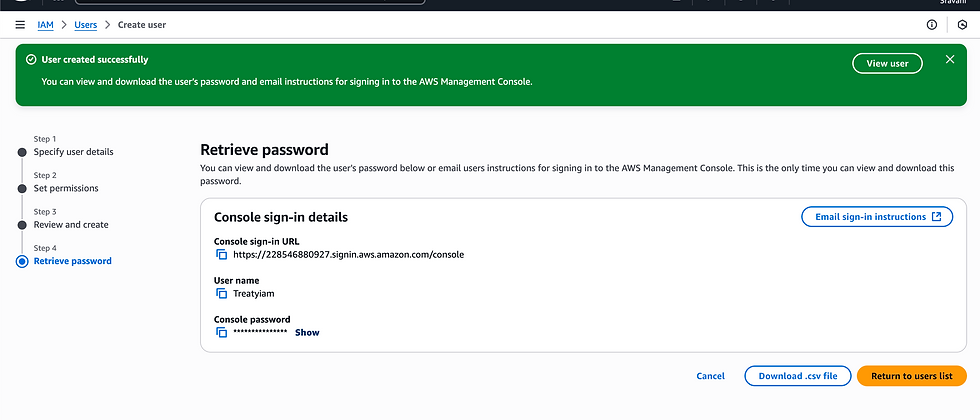
Upon creating the IAM user , the console sign-in details are provided, which can be stored or emailed to the respective user’s email (in this case, to themselves).
Attached is an example screenshot of where the console sign-in details are provided.
Once the IAM user account is created with required permissions, now the user shall login as a user. He can perform tasks by logging in as an IAM User. AWS recommends not to use the root user account for standard account activities. The root account is to be used only for critical account-level tasks like changing billing information, closing the account, or enabling certain features.
Similarly, other required users also can be created by giving them necessary permissions. This can be done from the user account itself.
Note that by default, any of the created users will be unable to access any of the AWS services, if the required permissions are not attached.
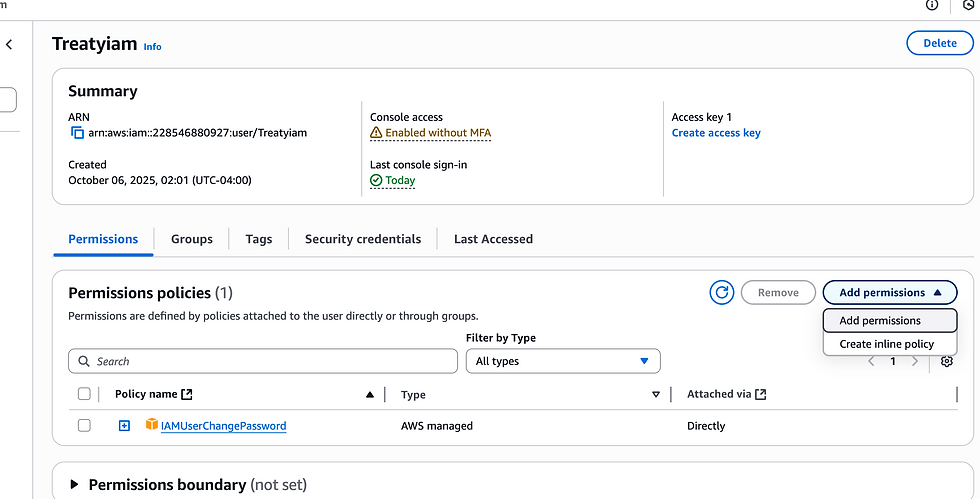
Here’s how Admin permission is attached from the root user account.
Click on Add Permissions
Search for AdministratorAccess under Permissions policies and add permission to the user.
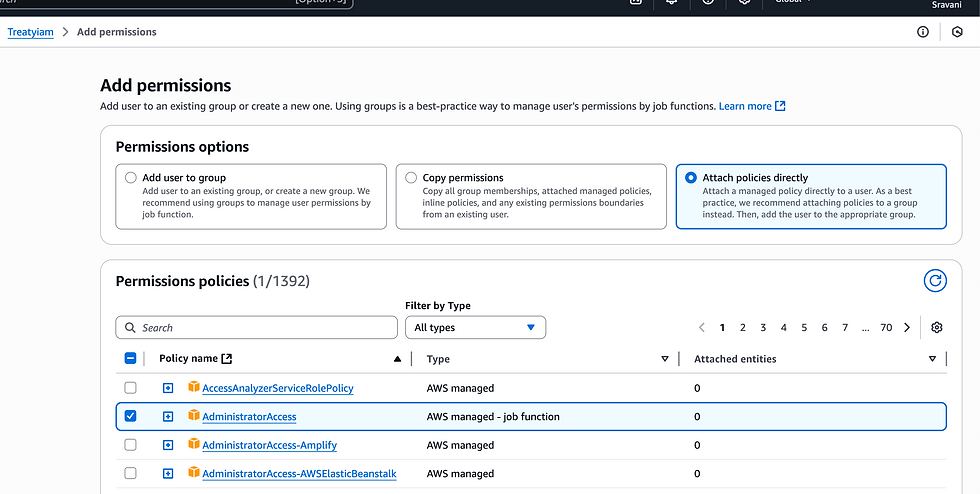
This will provide full admin access rights to the user.
Hence, the AWS console provides two ways of login in the UI :
1) IAM user sign in
2)Sign in using root user email
Following is the screenshot showing two login options
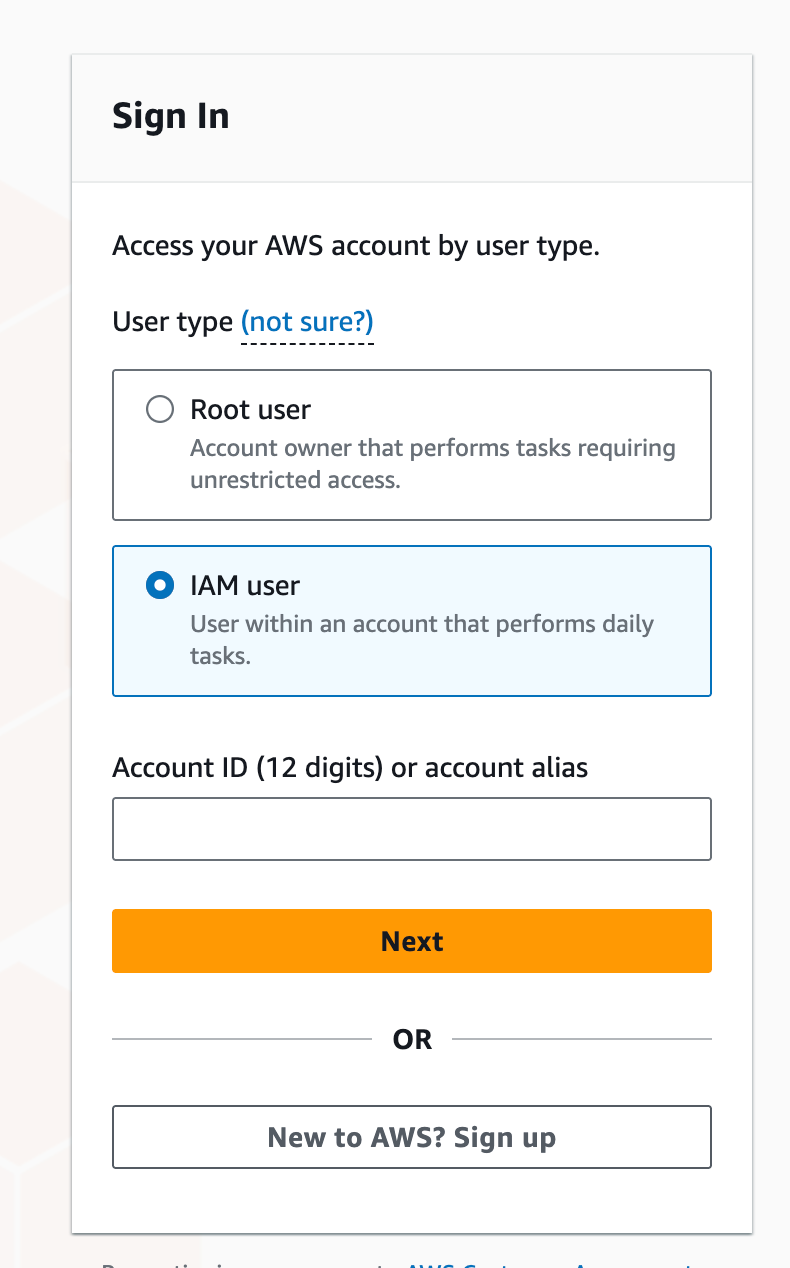
As discussed above, the user shall login as an IAM user.
Now let's understand the key components of IAM
User : An IAM User is a person that interacts with AWS resources .
(It could represent an app/service too ,however, AWS recommends using roles instead)
User groups: A set of users form an IAM User group.
It would be a herculean task to assign permissions to each member individually, in an organization.
If all the members in the DevOps team need AdministratorAccess, a DevOps group is created by adding all the relevant Users (members of the DevOps team) in it.
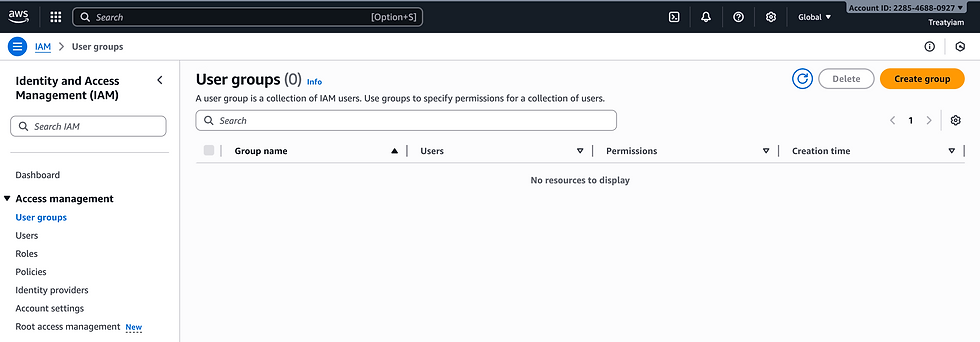
Here's how a group can be created. Go to User groups and click on Create group at the top right corner.
Name the group, Add users to the group and Attach permissions policies
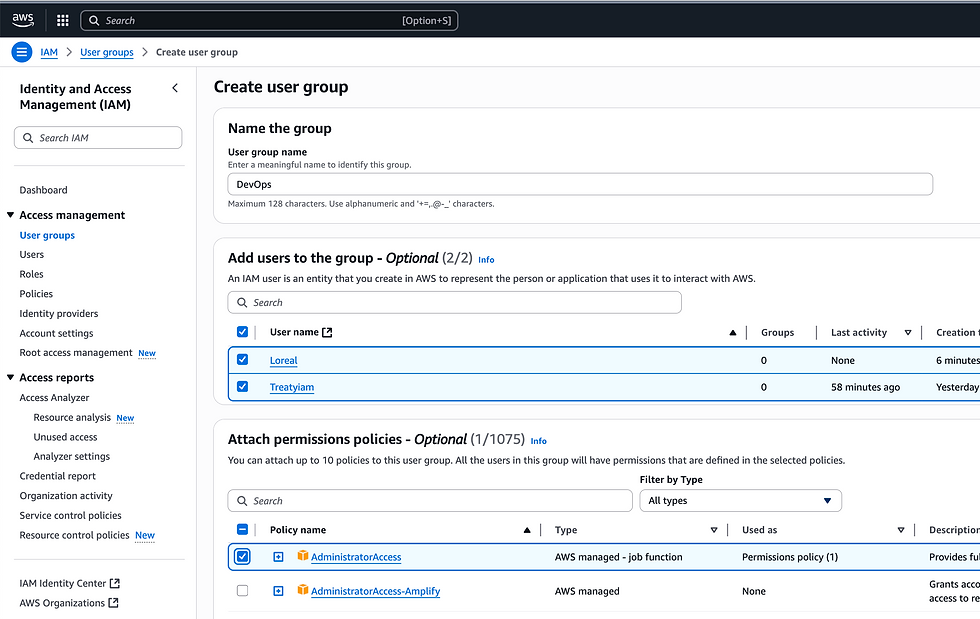
Click on Create user group at the bottom of the page and your job is done!
Roles: A role is an identity that has specific permissions assigned to it and it is assumed by users, applications and services.
In simple words, A role is what permissions you can assume temporarily.
Now you may question,
Why do we need to attach permissions to a role and then let the user assume the role, instead of directly attaching permissions to a user/group?
1) Security:
a)There's a risk of security if the user's credentials are compromised.
b) Instead of granting permanent policies to the user which he doesn't require most of the time, or manually granting and revoking within a short period of time, it's a security best practice that the user assumes the role whenever he needs it.
When a user or service assumes a role, AWS generates temporary credentials, which expire after a short configurable duration.
2)Only 10 policies can be attached to a user. If you request AWS, they may increase up to 25, but instead of attaching each policy to the user, you can attach all policies to a role and the user will assume the role.
3)Cross - account Access: An X person in Account A, can temporarily assume a role in Account B to access resources
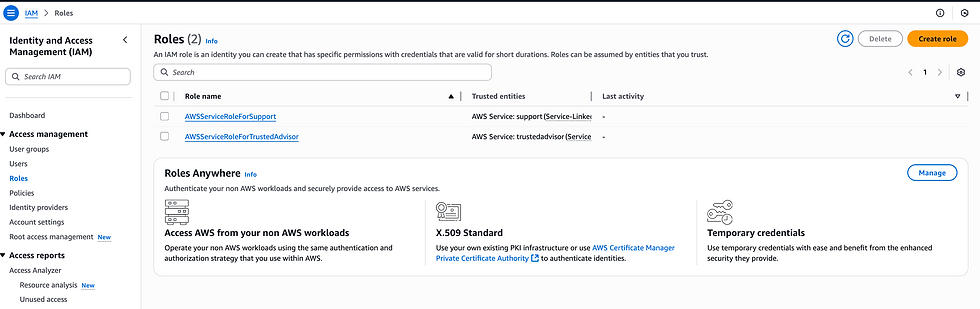
Here's how a role can be created via AWS console.
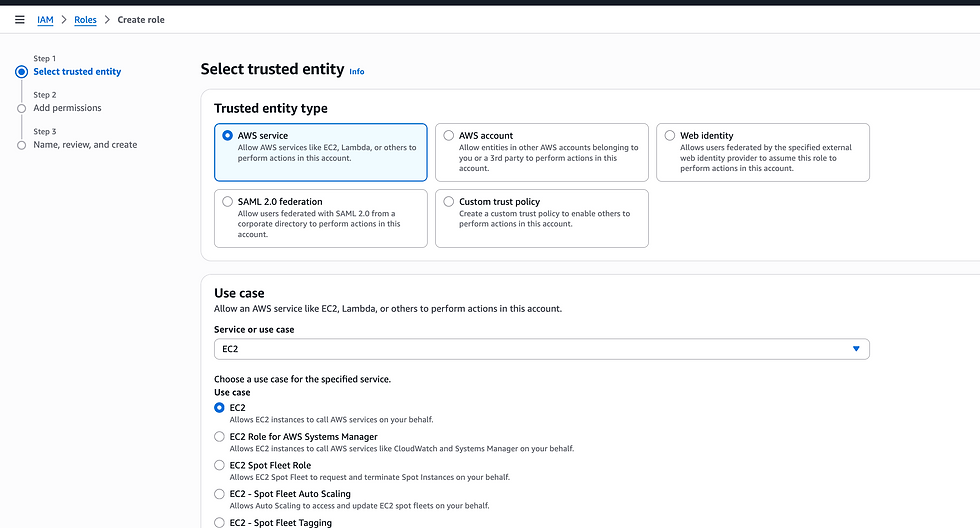
Let's see a typical example of giving an EC2 instance permission to access S3.
Select Create Role at the top right corner
Choose AWS service and Use case as EC2. Click Next
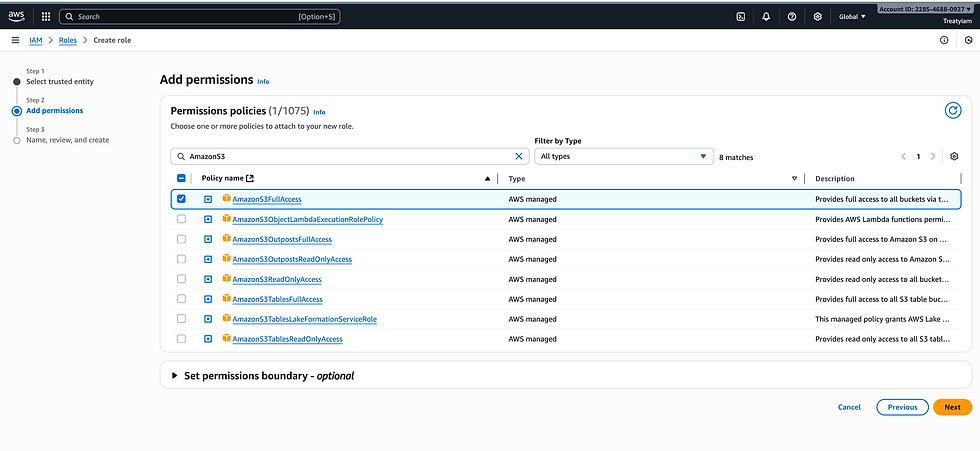
Now we select the policies that define what this role can do.
Here we attach AmazonS3FullAccess since we want EC2 to access S3. Attaching policies to Ec2 instance is called InstProfile.
Click Next
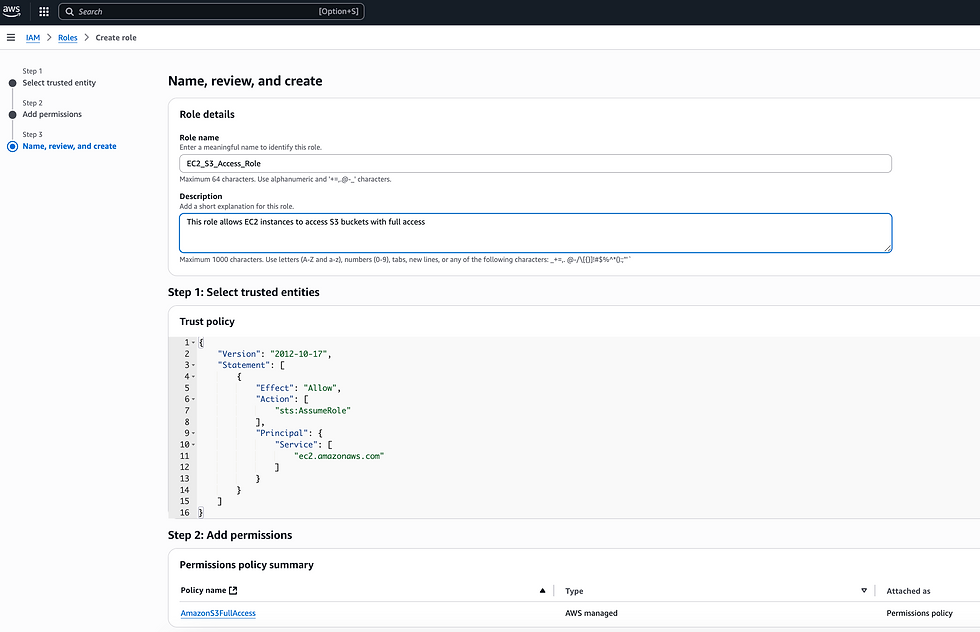
Give a Role name and add a short description as shown. Click Create Role
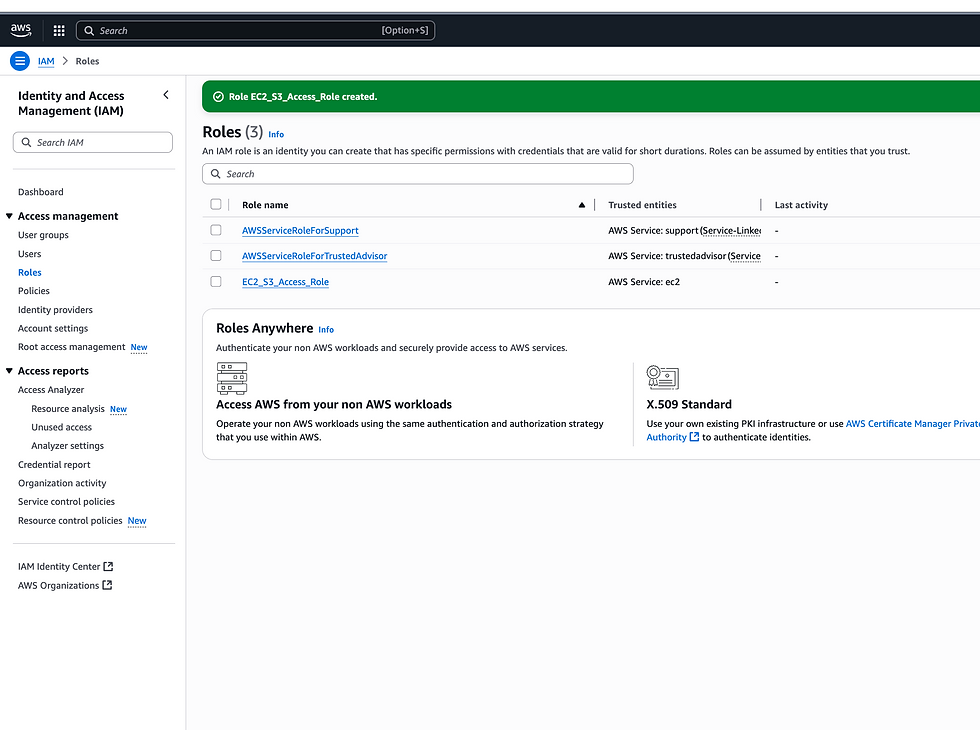
EC2_S3_Access_Role is created.
Once the role is created, you can attach the role either during EC2 launch or later to an existing EC2 instance.
Attaching a role to an EC2 instance grants any process or user on that instance the permissions of the role. AWS automatically makes temporary credentials available inside the instance, so users don’t need to configure their own IAM credentials there.
Policies
Policies are documents that define permissions and are written in JSON.
So a policy indicates the permissions themselves that define what the user/role can do.
This is the same concept we discussed in the beginning on how we can attach Admin permissions to an IAM user.
There are three kinds of AWS policies,
1) AWS-Managed Policy
2) Customer-Managed Policy
3) Inline Policy
AWS-Managed Policy
A predefined policy created and maintained by AWS. It grants common permissions like AdministratorAccess or AmazonS3ReadOnlyAccess. You can attach it to users, groups, or roles, and AWS automatically updates it when necessary.
Customer-Managed Policy
A custom policy that you create and manage. It can define very specific permissions tailored to your organization. Customer-managed policies are reusable across multiple users, groups, or roles, but you are responsible for maintaining them.
Inline Policy
A policy embedded directly into a single user, group, or role. It exists only for that entity and cannot be reused elsewhere. Deleting the user, group, or role also deletes the inline policy. Inline policies are useful for one-off custom permissions.
Following screenshot shows AWS managed policies which appear by selecting AWS managed under Filter by Type dropdown in Policies
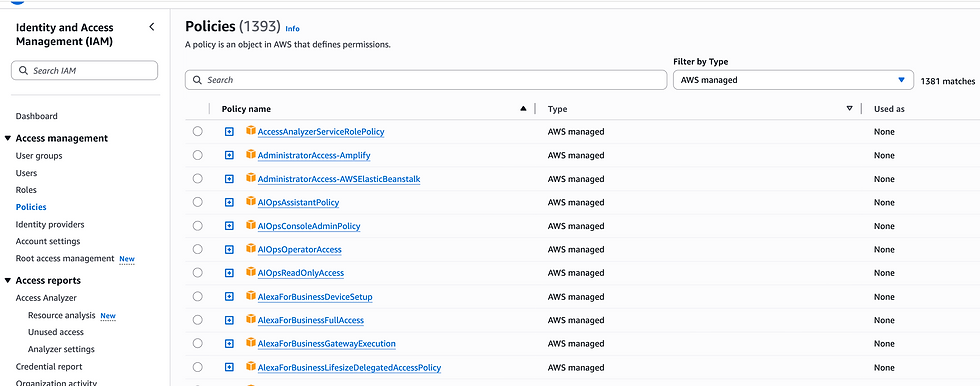
You can create a customer-managed policy by clicking on create policy. There you can see two options as it appears in the screenshot below. Visual editor(beginner friendly) and JSON editor(for writing custom policy JSON ).Choose your required option and then hit Next.
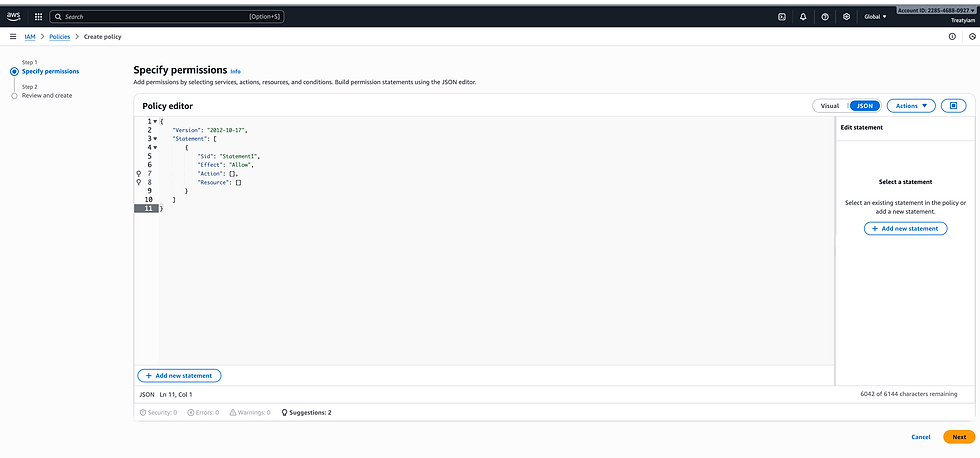
Attaching an AWS-managed or customer-managed policy works exactly like when we gave ourselves admin permissions instead of using the root account — the difference is only in who created the policy (AWS or you).
Inline policy
To add an inline policy go to Users and select the required User.
Click on Add permissions and select Create inline policy as shown in the screenshot below.
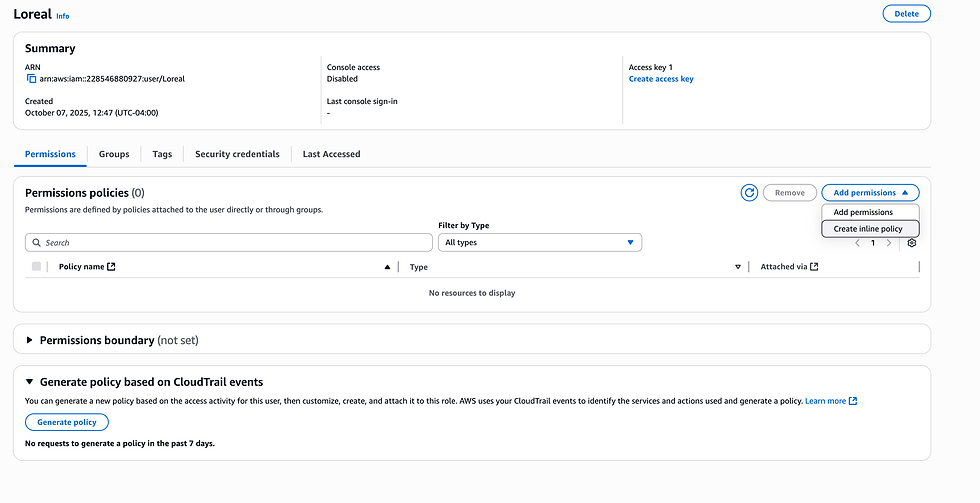
Choose Visual Editor or JSON as shown below
Example JSON for upload-only S3 access:
{
"Version": "2012-10-17",
"Statement": [
{
"Effect": "Allow",
"Action": [
"s3:PutObject"
],
"Resource": "arn:aws:s3:::my-example-bucket/*"
}
]
}
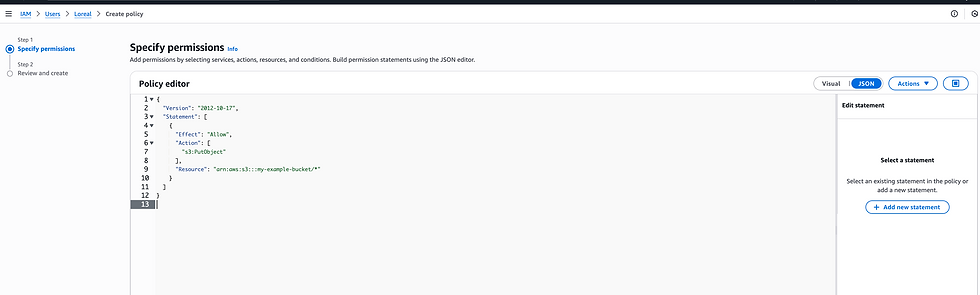
Click Next and Create policy
Your Inline policy is created!
Inline policies are embedded directly into a specific user, group, or role. This means if that user, group, or role is deleted, the inline policy is deleted along with it. Unlike managed policies, they don’t exist independently in IAM and cannot be reused.
Mastering IAM keeps your AWS environment secure, organized, and scalable.


