Mastering Test Case management: How to Create and Edit Test Case in Zephyr
Zephyr Scale is a Test case management tool, we integrated Zephyr with Jira to manage test cases.
In this blog we'll find how to Create and edit test case.
Create a Test Case
In Zephyr app click on New Test Case, "Create Test Case" pop up window appears, fill the mandatory field "Name".
Name: We can write the title of the test case in this field. It provides the description of what the test case is about.
Objective: This gives the information about the purpose of the test case. It explains what feature is being verified.
Precondition: Tells us about what conditions must be satisfied before executing the test case.
Details: Details has Status, Priority, Owner, etc., needed fields can be filled as they were not mandatory

Save the Test Case
Click on Create dropdown. We can see two options Create and Create and edit.

Create: Saves and Close the Create Test Case pop-up
Select Create and click on it, the test case is saved.

Create and edit: Opens the Test Case window for editing on more tabs.
Select Create and edit and click on it, this action saves the test case and immediately opens it in edit mode, allowing us to make further modifications.

Create and edit
If we use this option, while creating the new test case it navigates us to the "Test Case" page. In this page we can view and also add all the information in detail about Test case.
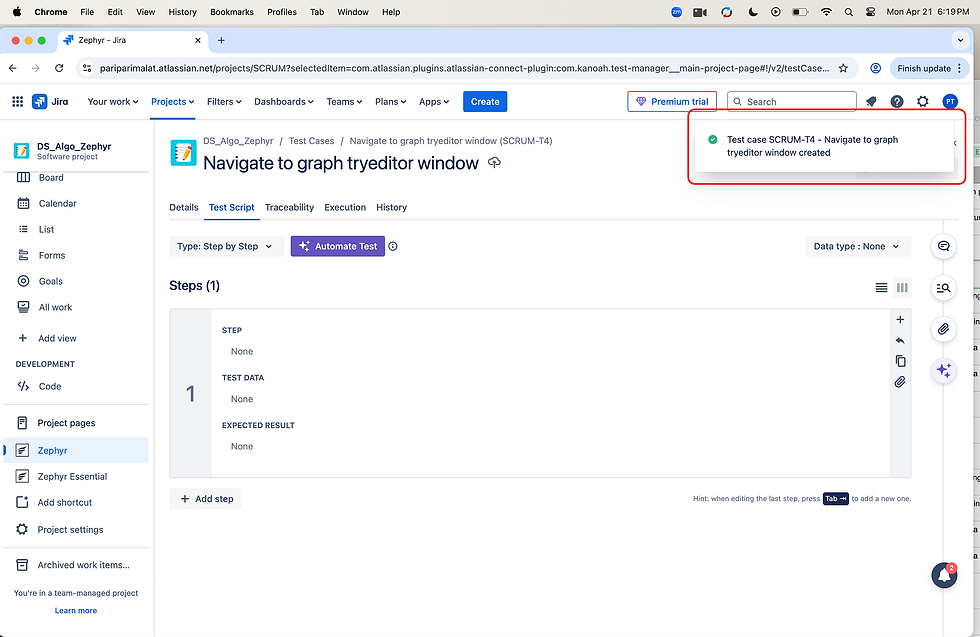
One more way to edit a test case in Zephyr Scale is through the Test Cases tab in the Zephyr application. The Test Cases tab displays all the test cases created. By clicking on one test case, we are navigated to its editing page, and we can make changes in different tabs such as Details, Test Script, Traceability, Execution, and History.
Detail explanation of editing a Test Case in Zephyr Scale
Each Test Case in Zephyr Scale is divided into several structured tabs, it has Details, Test Script, Traceability, Execution, and History tabs making it easier to organize and manage information.
Details Tab: It has Description, Details and Custom Fields sections.
In the Description section of the test case, we'll find key details such as the
Name - the test case title and is mandatory field,
Objective - what the test is verifying,
Precondition - conditions that must be met before execution,
In the Details section of the test case
Status, Priority and Owner for the workflow and responsibility tracking of the test case.
Component, Estimated run time, Folder, and Labels for classification and filtering.
Custom Fields: any fields defined by the admin for project-specific needs.

Test Script: This is where actual test steps are defined. It has Type, Data type and Steps. it outlines exactly how the test case should be executed and what results are expected.
Steps include STEP, TEST DATA and EXPECTED RESULT.

In Type: Select any one from the list. We can format the steps in either Step by Step, Plain Text and BDD-Gherkin.
Step by Step:
For now Step by Step is selected for the explanation.

Plain Text: It is a simplified way of documenting a test Script in Zephyr Scale. Instead of defining individual test steps, we can write the entire procedure in single rich text field.

BDD-Gherkin: allows to write test steps using the Gherkin language, which is readable by both technical and non technical users

Data type: Input values or environment conditions used during the test. choose any one from the list. None, Parameters and Test data

We can add another step by clicking on "Add step"

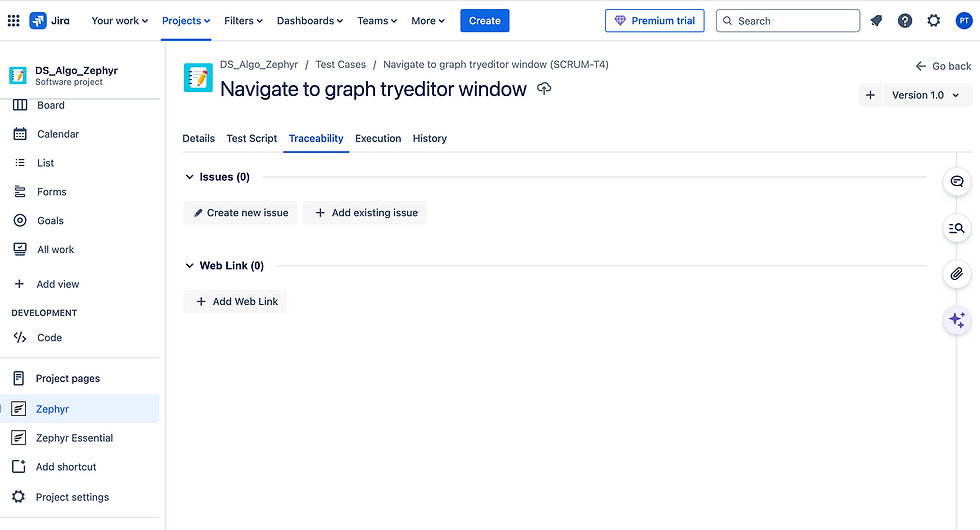
Traceability: Traceability tab connects the test case to related Jira issues. Test cases can be linked with existing stories, sub tasks, requirements, and bugs in Jira or new stories can be created in Jira and then link the test cases.
We can view test coverage by looking which requirements are tested and identify dependencies or risks.
Execution: Initially it shows the test case has no execution yet. Once the test case is executed, we can trace the execution history of the test case results. It displays which test cycles the test was included in, the status of each execution, who executed the test and when.
Defects logged during execution and links to detailed execution results.

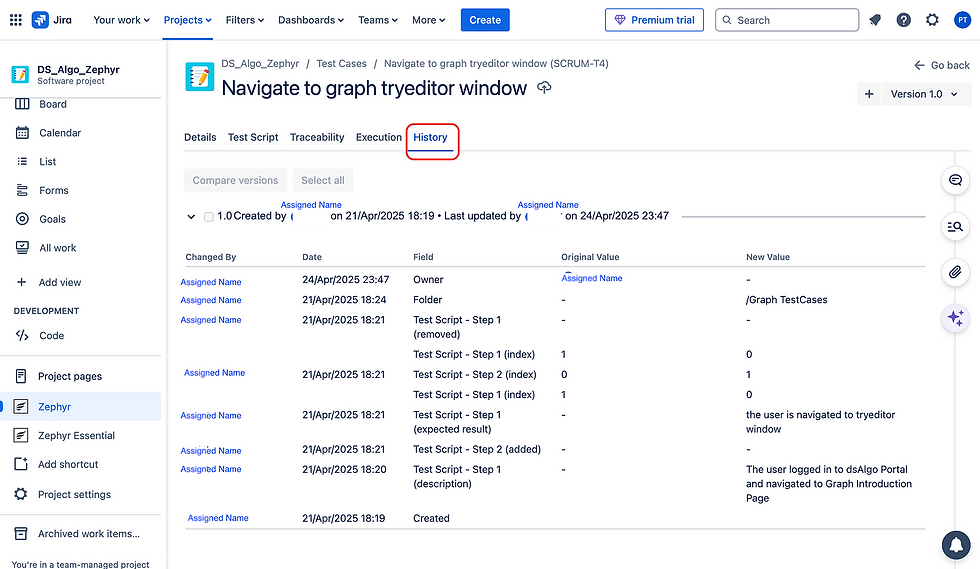
History: The "History" tab tracks every change made to the test case."History" tab tells us about the test case creation time and date, last updated by and the versions. Versions can be viewed and compared for analyzing purpose. when test case versions were selected and compared the differences are highlighted for the test case review.

If we expand the test case version , we'll find the person responsible for changes in the test case in "Changed By", "Date" it changed on, on which "Field" the changes happened, what is the Original Value and New Value.
By following these steps we can efficiently create and manage test cases in Zephyr, ensuring organized and quality oriented process for test management. This supports team collaboration and continuous improvement in the software testing life cycle.
"Knowing Zephyr's potential makes all the difference in today's test management, and this blog was inspired with that intention!"


