Mastering Data-Driven Testing in Selenium with TestNG DataProvider
- subymmathew
- Sep 2
- 3 min read
In modern automation frameworks, handling multiple sets of test data is a crucial part of building scalable and maintainable test suites. Instead of hardcoding values or duplicating test methods for each input, we can leverage TestNG’s @DataProvider annotation to implement true data-driven testing.
This post summarizes a step-by-step guide on how to integrate Excel-based test data into your Selenium tests using TestNG.
Why Data Providers?
A DataProvider in TestNG is a method that supplies test data to test methods. Instead of writing separate test cases for each dataset, you can:
Store test data in an external source (like Excel).
Fetch it using a utility class.
Feed it directly into your test case through the @DataProvider annotation.
This ensures reusability, scalability, and clean code.
Imagine you have a login test that accepts a username and password. If you need to test with five different sets of credentials, one naive approach would be to duplicate the test five times. This leads to bloated, repetitive code.
TestNG solves this problem with @DataProvider, which allows a single test method to run multiple times with different inputs. This not only improves reusability but also makes your framework much cleaner.
Key Steps to Implement Data-Driven Testing with TestNG
1. Start by adding the following Maven dependencies
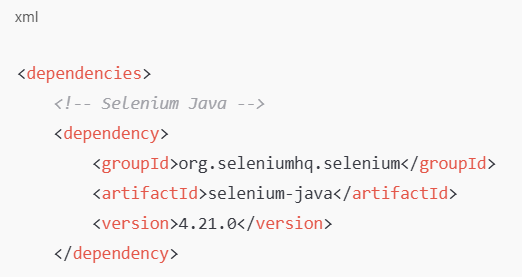


2. Prepare Test Data in Excel
Start by creating an Excel file (e.g., testdata.xlsx) where each row contains a set of values. For a registration form, columns could include:
First Name
Last Name
Address Line 1
Address Line 2
City
State
Zip Code
Email
Your test will fetch each row and treat it as a separate test execution.
3. Create a Utility Class for Reading Excel
Using Apache POI, build a utility method to read data from Excel.
This method:
Opens the Excel file.
Loops through rows (starting from row 2, since row 1 typically contains headers).
Fetches cell values into Java objects.
Stores each row in an Object[], and collects them inside an Array List.
Finally, the method returns this collection, which TestNG can use to feed your test.
3. Define the Data Provider Method
In your test class, create a method annotated with @DataProvider.
This method will call your Excel utility and return an Iterator<Object[]>. Each Object[] represents one row of test data.
Example:

4. Connect Data Provider to Your Test
Now, annotate your test with:

Here, the number of parameters must match the number of columns in your Excel file. TestNG automatically maps each column in a row to the corresponding parameter.
5. Execute the Tests
When you run the test:
TestNG fetches data from Excel.
The test executes once per row of data.
For example, if you have 5 rows, the same test method will execute 5 times—each with a different input set.
No need to duplicate test logic for multiple scenarios.
Benefits of Using @DataProvider
Reusability: Write one test method, run it with multiple datasets.
Maintainability: Add or update test data directly in Excel—no need to touch the code.
Scalability: Works seamlessly with hundreds of test records.
Professional Framework Design: Commonly used in real-world automation projects.
Conclusion
· The TestNG DataProvider is a powerful feature that brings true flexibility to your test automation framework. By combining it with Excel and Apache POI, you can easily build a data-driven framework that scales for real-world projects.
· This approach eliminates redundancy, keeps your tests clean, and makes handling large sets of test data straightforward.
· If you’re building automation with Selenium, mastering DataProviders is a must-have skill—both for productivity and for interview preparation.


