How to use Katalon Studio for Web Automation

In this blog, let’s see what is Katalon Studio, the basic UI tools in it that can be used to create a Test Case, execute the case, adding it to a Test Suite and running the Suite as a whole and generating the report after integrating it to TestOps.
INTRODUCTION:
Katalon Studio is an automation testing software tool developed by Katalon, Inc. The software is built on top of the open-source automation frameworks Selenium and Appium with a specialized IDE interface for web, API, mobile and desktop application testing. The software comes in a complete package and framework.
What all can be achieved by the Katalon Studio:
Help us in automating Web, Mobile and Web Services testing.
It can record and playback
It is compatible with Windows and Mac operating system.
It can easily be integrated with other software programs like Jira, Git, Jenkins etc.
It can be used for generating Test Reports.
INSTALLATION:
Go to https://katalon.com/download and download the suitable Katalon Studio version for your operating system.
Double click on downloaded KatalonSetup.exe file to start the Katalon studio.
We can see the below Splash screen

Once installed, we will be prompted with the below screen

Select “Log in from Browser” and login using your valid personal email account.

Now we have successfully installed and logged in to Katalon Studio.

CREATE A NEW PROJECT:
Click on New Project
Provide Project name, Start with Blank Project and select any location where you want to place the project in the system and click on OK.

TEST EXPLORER VIEW:
The Test Explorer displays the structure of our project. We can see the list of artifacts which are available in the project by default.
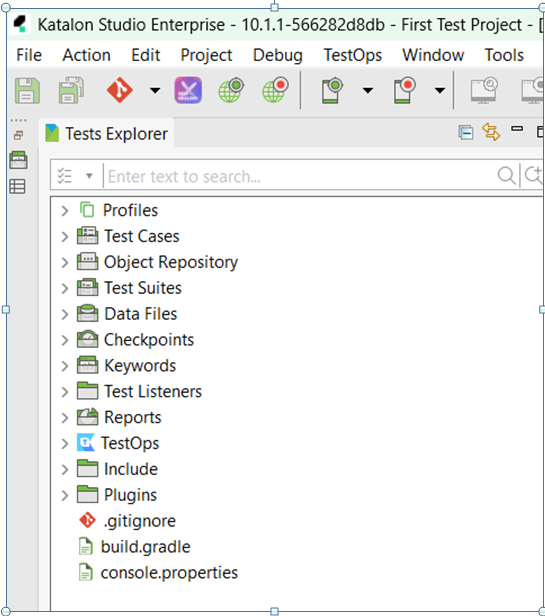
There is a context menu and Search box on the top to help us filter the artifacts as per our needs.

By default the Tests Explorer displays all the Test Artifacts. You can also customize the Tests Explorer view. For this go to Project > Settings > Explorer. Just select only the artifacts you would like to be displayed and click on Apply.

TEST CASE CREATION:
We create a Web test case in Katalon Studio using Web Record Utility. We can perform every action on the web while the Web Record utility records them.
Steps:
From the main tool bar click on Record Web option.
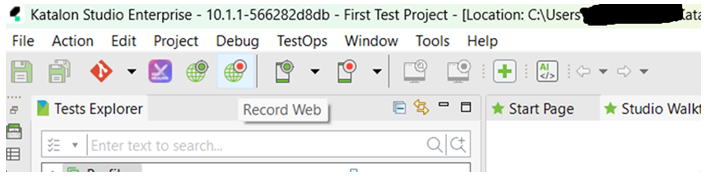
Web Recorder dialog box appears.

Provide the Web URL you want to test. I have used https://bstackdemo.com/signin. Click on the down arrow near the Record and it will list the compatible browsers.

Select the browser you would like to use and you will be prompted with a below alert window asking you to install the necessary browser extension.

Click on Install extension and install it. After installation, you can see the below extension in your browser.

If you have already installed it, you can just click on Continue recording. Your recording starts by launching the selected browser and navigating to the specified Web URL. You will also see the Web Recorder with the Recorded Actions. If you don’t see the Recorded Actions automatically Expanded, just click on Expand button. You can see that each actions you perform on the Web is captured.

When you hover over any web element you will see the xpath of the element on the top.

You can modify the recorded actions like Remove, Move Up, Move Down. Please make sure the flow is still logical after you make changes. Once completed, click on Save Script. Recording is stopped now.

A pop up called “Add Element to Object Repository” is displayed. Web Record Utility exports a list of objects captured in the test case. Select the option to select the folder option and click on Ok.

A pop up to provide the Test Case name is displayed. Provide a name and click on Ok.

In Tests Explorer, you can now view your new test case under Test Cases and Objects under Object Repository.

If you click on Record Web again while being on the test case that you created just now, it will prompt you asking if you would like to continue recording the test case.

If you select Yes, it will prompt again asking if you would like to Append to the current test case or Overwrite the current test case. You can choose either one you would like to perform. Please note that if you select Append to the current test case, it will again launch the browser and navigate to the URL, but add the next steps below the existing steps.

RUN THE TEST CASE:
Open the test case you would like to Run and see Run button is enabled on the top tool bar.
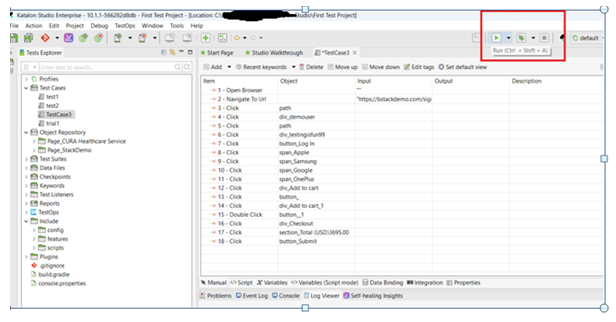
Once Run button is clicked, Test case execution is started.
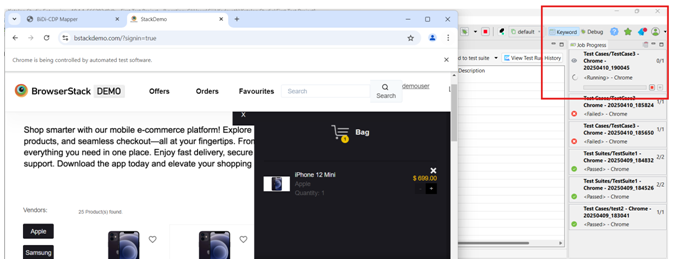
We can see a Job Progress bar, which shows the progress of the test case execution. A browser window where the test case is being executed and a Log viewer tab below which displays the logs of the test execution.

TEST SUITE CREATION:
One can group a set of test cases which are related to a common testing objective into one common Test Suite. Let’s see how to plan and run a Test Suite.
Right click on the Test Suites > New > Test Suite.

Provide a Test Suite name.

Click on Add

Select all the test cases you would like to add to the Test Suite.

Now you can see the Test Suite is created with the list of test cases. Test cases can be still Added, removed, moved up and down from here.

Now click on the Run button at the top and run the Test Suite. Wait for all the test cases in the test suite to be executed and you can view the status as below:

TEST REPORTS:
We can generate Test Reports of our executed Test Cases in Katalon Platform. We have to make following settings in the Katalon Studio to generate reports.
Go to Project > Settings > Katalon Platform.
Select “Enable Katalon Platform Integration” and select the Project.
Select “Enable Katalon TestCloud Integration” and “Automatically upload all test reports to Katalon Platform” and click on Apply and close. After the test execution, the reports are automatically uploaded to Katalon TestOps

VIEWING OF TEST REPORTS:
After running the test case / script, go to https://testops.katalon.io/ and login using the same credentials you used to login Katalon studio. You can view latest run details in the home page.

Once you click on the project you will be taken to the Dashboard with all the Test Runs till date on the project

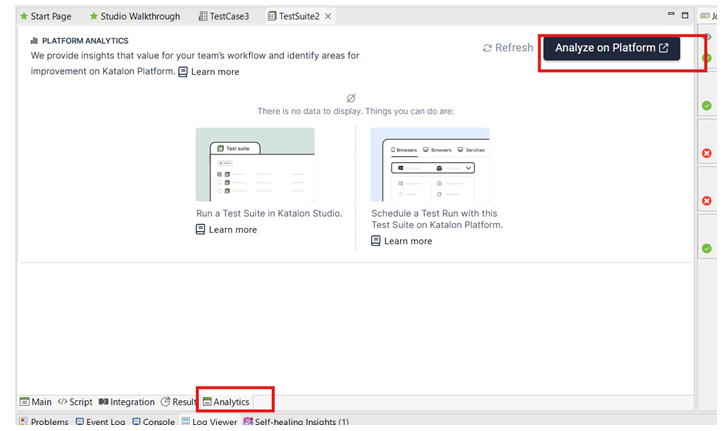
You can also view the Katalon Ops test report directly from Katalon Studio. In the bottom of the Test Suite, you have options to view the Scripts as Main, Script, Integration, Result and Analytics. Click on Result. It shows the complete Test Suite execution status along with options to Export the Reports. Export Report helps you download the report locally. Clicking Katalon TestOps helps you view the report in to https://testops.katalon.io/

Another option is to access the Katalon TestOps report from Analytics > Analyze on Platform.
From Test Suite, click on Main > View Test Run History. It will take you again to Katalon TestOps, but to Test Suite page showing more information about the Test Suite.


You can also reach the Katalon TestOps page from the Tests Explorer.

Thus, we have seen a very basic flow of how to record and playback a test case and generate and view the report using Katalon Studio.
Thanks for reading and keep learning !!!


