Excel Reader and DataProvider
- Disha Gupta

- Sep 1
- 4 min read
Hello everyone!!
I would like to share my knowledge on how we can read data from the excel and how we can use data providers.
Let’s first understand why we need an Excel Reader.
When we write our tests in Selenium, we often need to run the same tests with many different inputs. For example:
· Testing Login with multiple username and passwords.
· Running “Try Editor” in Ds Algo with different codes and checking outputs.
· Checking different practice questions in Ds Algo with varying input/expected output.
If we hardcode all this data inside our test classes, the file becomes very long and changing and managing data later is difficult.
That’s why we store our test data in Excel so that it’s easy to add/edit/remove rows without touching Java code.
But Java cannot directly understand Excel Files. That’s where Excel Reader Utility comes in.
What is an Excel Reader File?
The Excel Reader File is just a Java utility class that we create. It is not something built in. We write it once and then reuse it everywhere in our framework.
It’s job is to open an excel file (.xlsx/.xls) using Apache POI library.
Now, let’s understand How to Use It?
STEP 1:
So, firstly, we need to add following dependencies in our pom.xml file.

These dependencies are used to read, write, and manipulate Microsoft Office Files (Excel, Word, PowerPoint, etc.)
First one is the core POI library which mainly supports the older Microsoft Office binary formats (.xls, .doc, .ppt) which were used before 2007.For excel, it lets us work with HSSF (.xls) files.
Second one is for newer XML-based Microsoft Office formats (2007 +). For excel it supports XSSF(.xlsx) files.
Step 2:
Now, we need to create an excel sheet with data as shown.

Step 3:
Now, we need to place this sheet under “src/test/resources/testData/TestNG_data.xlsx” folder. Here, TestNG_data.xlsx is our excel file. See below image for reference-

Step 4:
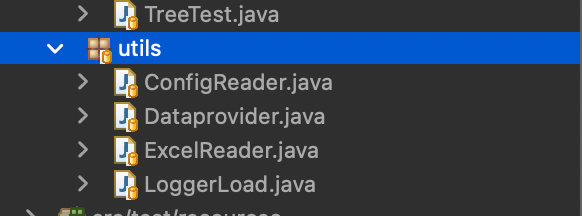
Create a Java file named ExcelReader.java under utilities package in the project as shown:
Step 5:
Now, we must create Java code as shown here to read data from excel sheet in ExcelReader.java class.

Explanation:
Let’s understand it step by step, First ConfigReader loads the path of our excel sheet and reads it from the config.properties file in our framework (like path = src/test/resources/testdata/TestNG_data.xlsx). Then the file is opened using FileInputStream and it is loaded into an XSSFWorkbook so that we can access sheets, rows, cells etc. from our excel sheet.
Inside the method we are first fetching the particular worksheet from our workbook and storing it inside a variable (sheet), which can further be used to fetch each row and cell inside that sheet.
Data formatter is used to make sure that we get values in String format (instead of raw numbers, formulas, etc.)
Now, we are storing testData in HashMap as key-value pairs. The first loop navigates through the rows, starting from row 1(skips the header row, which is row 0), and stores the current working row in a variable. The second loop navigates through the column of the current row being worked upon and stores header cell as key and current row’s cell as value inside the HashMap. The function returns that HashMap, which is further used inside other functions.
DataProvider
In TestNG, the @DataProvider annotation is used for data-driven testing. It allows us to run the same test multiple times with different sets of data without writing separate test methods. This is very useful when we want to test the same functionality with multiple input values like login credentials.
How @DataProvider Works
A method annotated with @DataProvider returns data in the form of 2D object array (Object[][]). The test method that consumes the data uses @Test(dataProvider = “name”) to run with those values.
Here is an example -

Here, the test method will run for all the three data provided in loginData DataProvider and will show the print message 3 times for each set of data.
Now, we will learn how to combine @DataProvider annotation with the Excel to supply data to our test cases. Because if we combine the two, it becomes a powerful way to handle multiple inputs without hardcoding values in test script.
Steps 1 to Step 5 remains the same since we also need an excel reader file here. We will be using the same excel reader file here as shown earlier. Here are the DataProvider and test methods that use it –

Here in this DataProvider code 2 hashMaps(testDataValid, testDataInvalid) store data returned from the readExcelRow method used in our ExcelReader File which are further stored in a 2D object which is used inside our test methods to provide data.
Test Method that uses DataProvider-

Here, the test will execute two times, one for valid code data and the other for invalid data as fetched from the excel.
Benefits of using excel with @DataProvider:
· Easy to maintain test data without touching code.
· Can handle large data efficiently.
· Reusable utility for multiple test classes.
Conclusion:
Using @DataProvider with Excel in TestNG is one of the most practical ways to implement data driven testing. By separating test logic from test data, we can make our framework more flexible, reusable and scalable.
Happy Learning :)
Thank you for reading and please give your valuable feedback.


