Dockerize A Spring Boot App Using Docker Compose: A Step-by-Step Guide


In this blog post, we’ll learn how to Dockerize a Spring Boot application using Docker Compose, which is especially helpful if you also use services like a PostgreSQL database.
But before we start, let's understand what Docker is. Docker is an open-source platform that allows you to package, distribute, and run applications in isolated environments called containers. Think of a container like a lightweight, portable mini-computer that includes:
○ Your application code (e.g., a Spring Boot JAR),
○ Its dependencies (Java, libraries, configs),
○ And even the OS-level environment it needs (without the full OS).
This means your app will run the same way everywhere—on your laptop, a colleague’s PC, or a cloud server—without the “it works on my machine” problem. Docker Hub has many prebuilt images—official and community-contributed—that you can pull and use directly in your Dockerfiles or docker-compose.yml files.
So, let's get started with Dockerizing the application.
Pre-requisites:
Java 17+
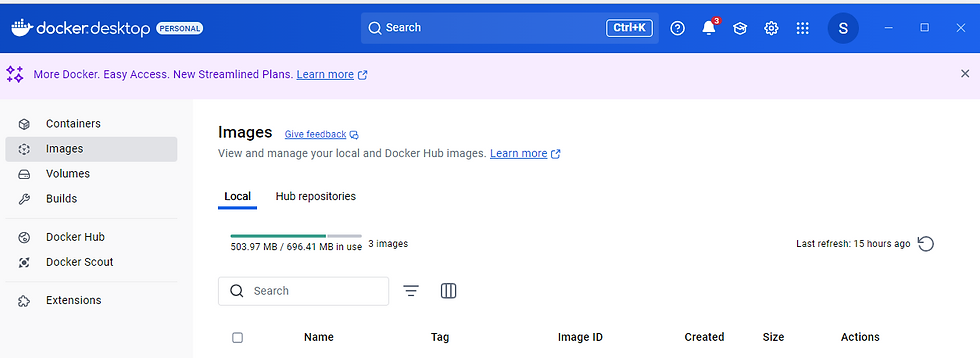
Docker Desktop is installed.
Docker Desktop is an easy-to-use application for building, running, and managing Docker containers on your local machine. It includes everything you need to work with Docker, like Docker Engine, Docker CLI, Docker Compose, GUI Dashboard, etc.
Spring Boot app ready
Maven (for building)
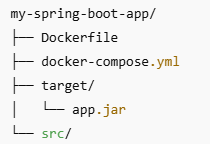
On the left, you can see what your project folder might look like, and we'll be creating a Docker file and, docker-compose.yml file in the coming steps.
First, create a Dockerfile in your project root directory:
A Dockerfile is a text file that contains a series of instructions on how to build a Docker image. It defines the environment your application runs in—including the operating system, programming language runtime (like Java), dependencies, configuration files, and the commands to run your app.
# Start from a lightweight Java 17 base image
FROM openjdk:17-jdk-slim

# Set the working directory inside the container
WORKDIR /app

# Copy the jar file into the container
COPY target/*.jar app.jar

# Expose port (adjust based on your app)
EXPOSE 8080

# Command to Run the Spring Boot app
ENTRYPOINT ["java", "-jar", "app.jar"]
Next, create a docker-compose.yml file in the root directory as well:
Docker Compose is a tool used to define and run multi-container Docker applications. Instead of starting containers one by one with long commands, you use a single docker-compose.yml file to manage everything—services, networks, and volumes. For example, if we have PostgreSQL as a Database and Redis for Caching, we don't have to pull and run the services one by one, instead, we can define all the necessary service configurations in one YAML file and start everything with a single command.
version: '3.8'

services:

  app:
    build: .
    container_name: springboot-app
    ports:
      - "8080:8080"
    depends_on:
      - db

    environment:
      SPRING_DATASOURCE_URL: jdbc:postgresql://db:5432/mydb
      SPRING_DATASOURCE_USERNAME: postgres
      SPRING_DATASOURCE_PASSWORD: postgres

  db:

    image: postgres:15
    container_name: postgres-db
    environment:
      POSTGRES_DB: mydb
      POSTGRES_USER: postgres
      POSTGRES_PASSWORD: postgres
    ports:
      - "5432:5432"

volumes:
  pgdata:
This docker-compose.yml file defines two services—app and db—and a named volume called pgdata. Here's a breakdown of each section:
version: '3.8'
Specifies the Compose file format version. Version 3.8 is commonly used and supports features like named volumes and dependency control.
Services
app (Spring Boot Application)
build: .Builds the Docker image from the Dockerfile in the current directory.
container_name: springboot-app sets a custom name for the container.
ports: "8080:8080" Maps container port 8080 to the host’s port 8080.
depends_on: - db Ensures the database container starts before the app.
environment: Passes environment variables that configure the Spring Boot app to connect to the DB service (PostgreSQL).
db (PostgreSQL Database)
image: postgres:15Uses the official prebuilt image for PostgreSQL version 15 from Docker Hub.
container_name: postgres-db sets a custom name for the DB container.
environment: Initializes PostgreSQL with:
POSTGRES_DB: database name
POSTGRES_USER: username
POSTGRES_PASSWORD: password
ports: "5432:5432" Exposes the default PostgreSQL port on the host machine.
volumes: pgdata
Declares a named volume called pgdata. Although it's defined here, it's not currently attached to the DB service.
To persist PostgreSQL data, you should update the db service to use this volume like so:
volumes: - pgdata:/var/lib/postgresql/dataThis way, database data won't be lost when the container is stopped or removed.
Now that you have the Dockerfile and docker-compose.yml in place, it's time to build the images and start the containers.
Step 1: Build the Docker Image and Start Services
In your project root directory (where both files are located), run:
docker-compose up --buildThis command will:
Build the Docker image for your Spring Boot app.
Pull the PostgreSQL image from Docker Hub (if not already pulled).
Start both containers (springboot-app and postgres-db) in a single network.
Stream logs from both services to your terminal.
Step 2: Verify Everything is Running
Once the containers are up, you can:
Visit your Spring Boot app at: http://localhost:8080
Access PostgreSQL (e.g., via a DB client) at: localhost:5432, user: postgres, password: postgres.
Step 3: Stop and Clean Up
To stop the running containers:
docker-compose downTo also remove named volumes (like pgdata):
docker-compose down -vConclusion
Dockerizing your Spring Boot application using Docker Compose makes development and deployment more consistent, scalable, and convenient. By bundling your app and its dependencies (like PostgreSQL) into isolated containers, you eliminate "works on my machine" issues and make onboarding or cloud deployment smoother.
You now have a complete environment running with just one command, ready for development, testing, or even production (with minor tweaks).
Happy Dockerizing! 🐳🚀


