Configuring Cross-Browser Testing in Jenkins with Build Parameters Using a Selenium Project from GitHub

Updated: Feb 26
In modern web applications, users access systems through different browsers like Chrome, Firefox, and Edge. However, web applications may behave differently depending on the browser’s rendering engine, JavaScript execution, or security settings.
That’s why cross-browser testing is critical. It ensures consistent functionality and user experience across multiple browsers. Automating this process using Jenkins makes your testing scalable, repeatable, and CI/CD-ready.
In this blog, we will configure cross-browser testing in Jenkins using build parameters with a Selenium project hosted on GitHub.
Why Cross-Browser Testing Matters
Even if your tests pass in one browser, they may fail in another due to:
UI rendering differences
Browser-specific compatibility issues
JavaScript execution variations
CSS behavior differences
By integrating cross-browser automation into Jenkins, we can dynamically run tests on different browsers without modifying the test code.
⚙️ Tools & Technologies Used
Selenium WebDriver
Java + TestNG
Maven
Jenkins
GitHub
Browsers (Chrome, Firefox, Edge)
A Selenium project (configured in Eclipse with BrowserOptions and DriverFactory classes) pushed to a GitHub repository.
What Are Jenkins Build Parameters?
Jenkins is a CI/CD automation server used to build, test, and deploy applications automatically.
Build parameters allow us to pass dynamic values to Jenkins jobs at runtime. In our case, we use a parameter to select which browser (Chrome, Firefox, Edge) the automation tests should run on — without editing the framework code.
Step 1: Prepare and Push Your Selenium Project to GitHub
Before configuring Jenkins:
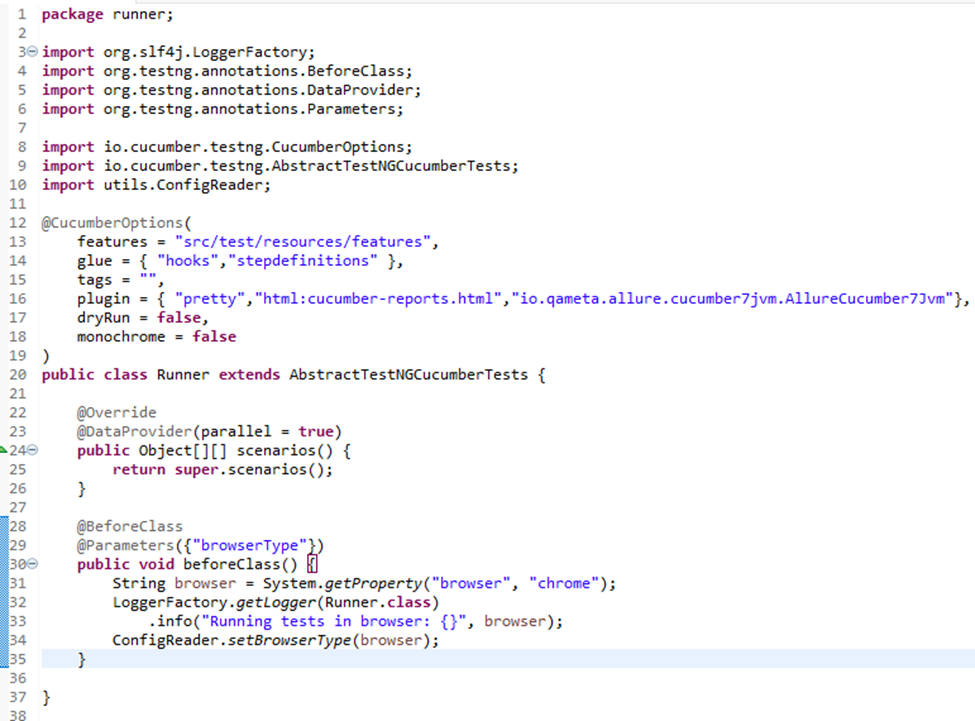
Ensure your Selenium framework supports browser parameterization.
Runner Class:
testNG.xml:
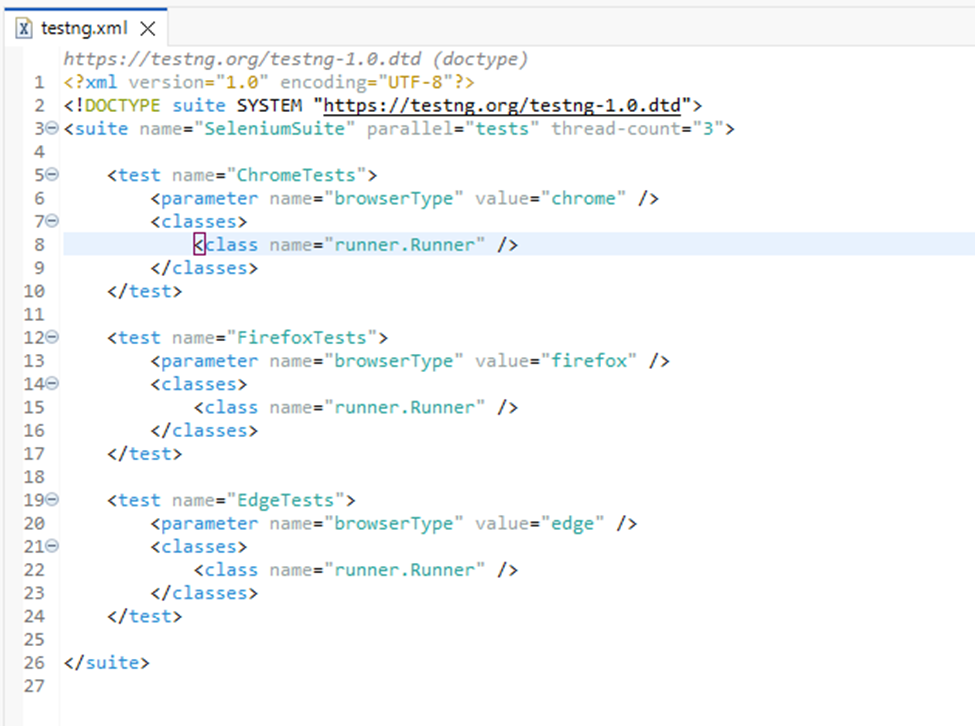
The browser value should be passed dynamically using:
-Dbrowser=chrome
Inside your framework, implement logic like:
If browser = chrome → Launch ChromeDriver
If browser = firefox → Launch FirefoxDriver
If browser = edge → Launch EdgeDriver
Push your complete project to GitHub so Jenkins can pull the latest code during execution.
Push to GitHub:
Open the command prompt in your Eclipse project folder
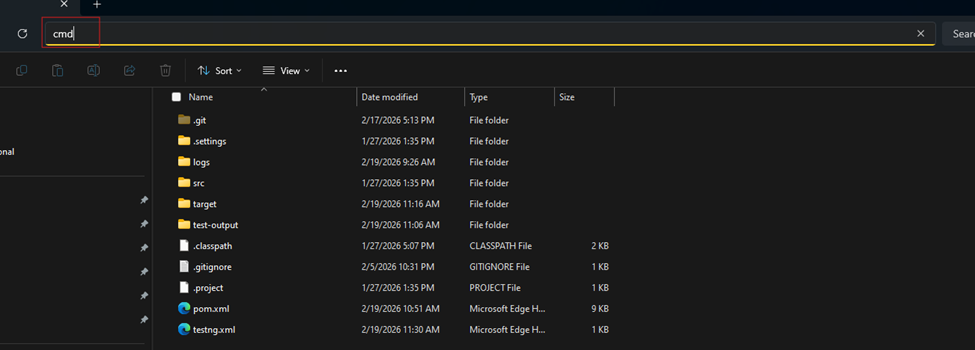
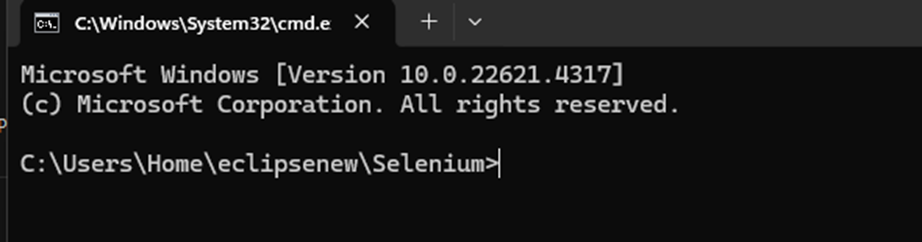
Initialize Git using git init
Add your remote repository:
git remote add origin https://github.com/githubName/repositoryname.git
push the code using
git add .
git commit -m "Initial Selenium Cross Browser Framework"
git push -u origin main
Step 2: Create and Configure Jenkins Job
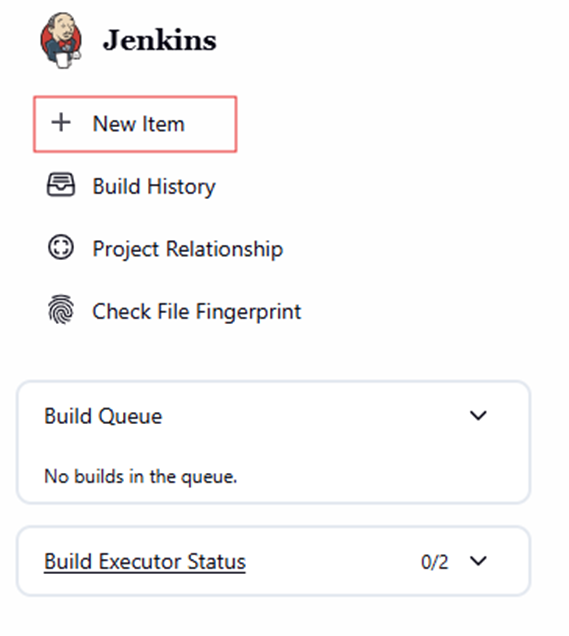
1️⃣ Create a New Job
Click New Item
Choose Freestyle Project
Enter a project name
Freestyle jobs are simple and suitable for basic automation pipelines.
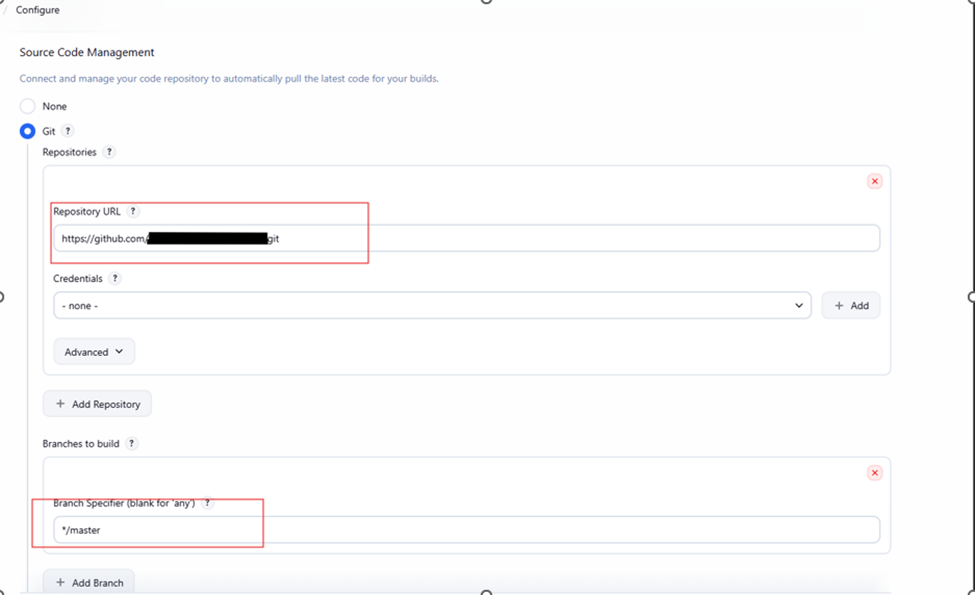
2️⃣ Connect Jenkins to GitHub
Under Source Code Management:
Select Git
Enter your repository URL
Configure credentials if required
This ensures Jenkins fetches the latest automation code during each build.
Step 3: Enable Build Parameters
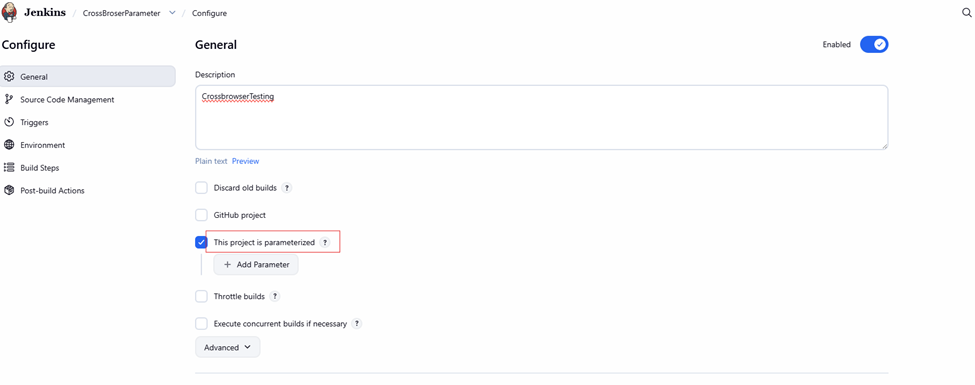
This is the key step for cross-browser execution.
Provide a project description.
Select This project is parameterized
Click Add Parameter
Choose Choice Parameter
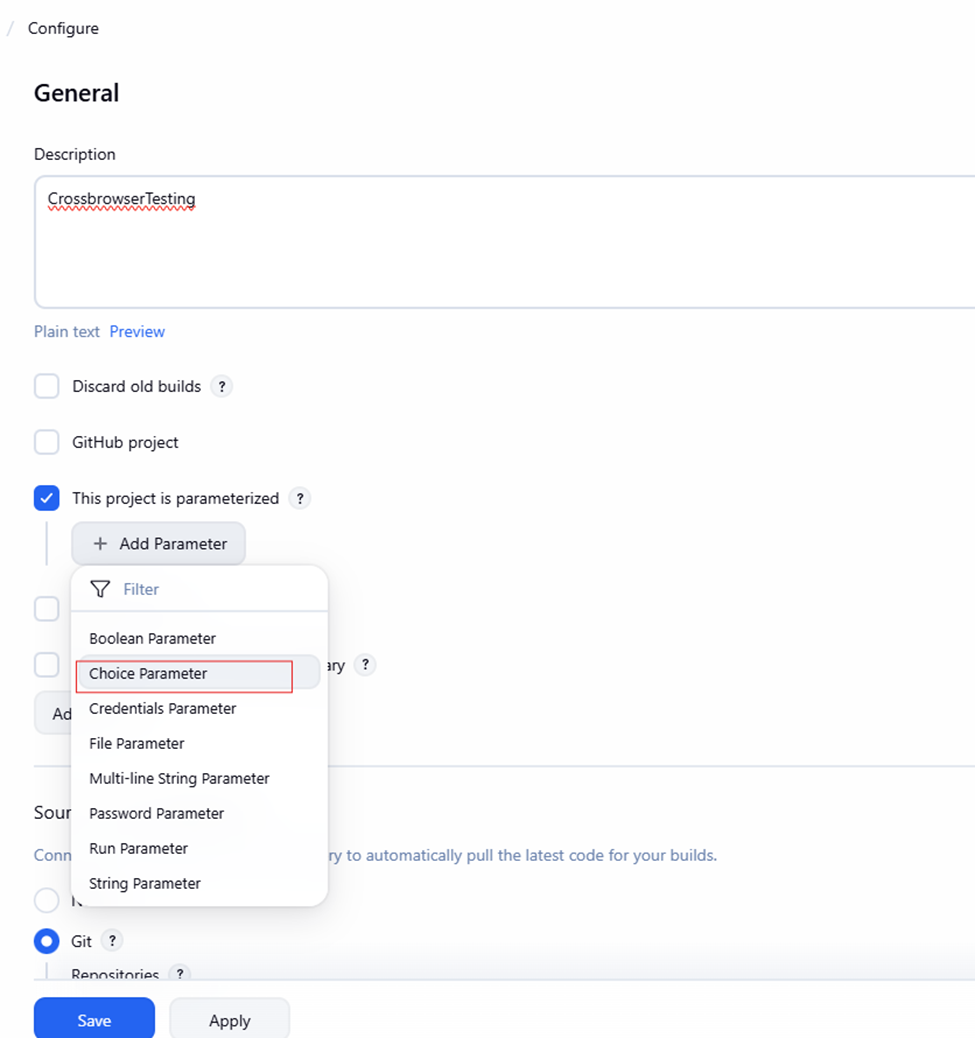
Configure Choice Parameter as:
Name: BROWSER
chrome
Firefox
edge
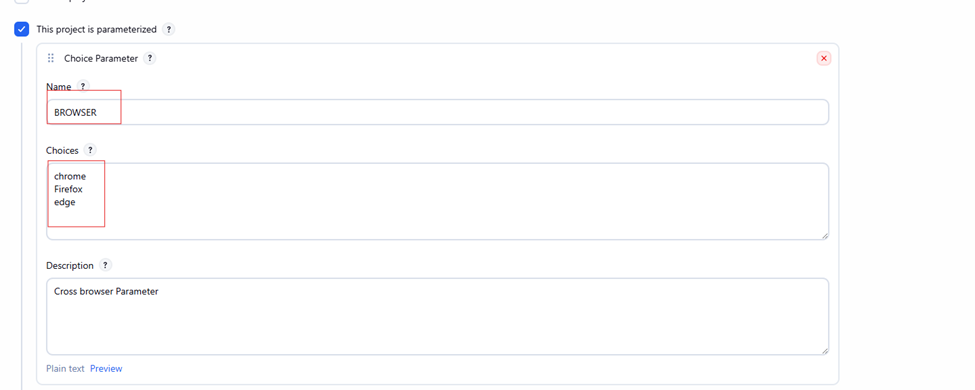
Instead of hardcoding the browser, Jenkins now allows dynamic selection during runtime.
Step 4: Configure Maven Build Command
Under Build → Invoke Top-Level Maven Targets
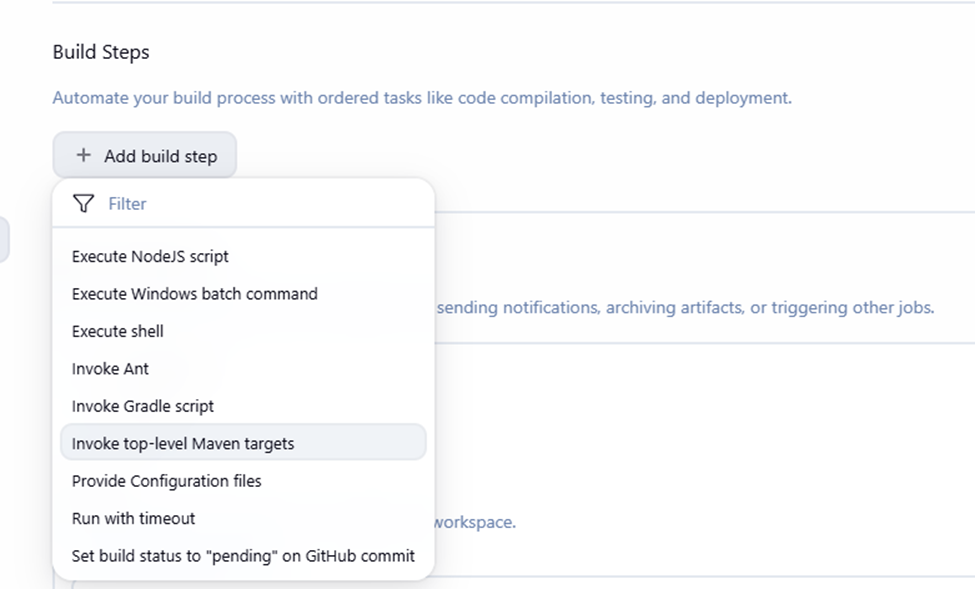
Add Maven Version and in Goals give command : clean test -Dbrowser=${BROWSER}
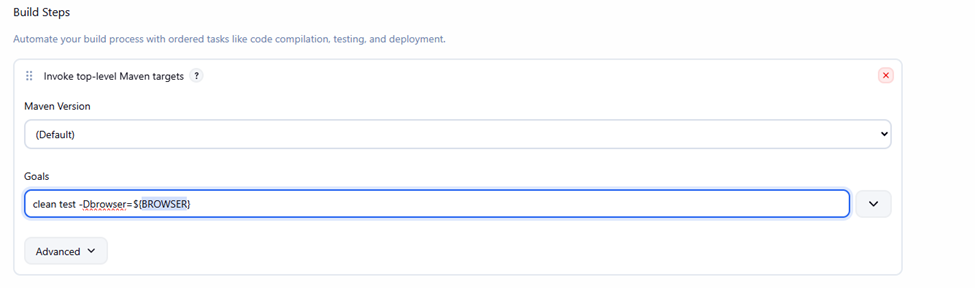
What happens here:
${BROWSER} takes the selected browser value
Maven executes the test suite
Selenium launches the chosen browser
This connects Jenkins parameter selection to your test framework.
Post-build Actions: Provide the paths for your test reports
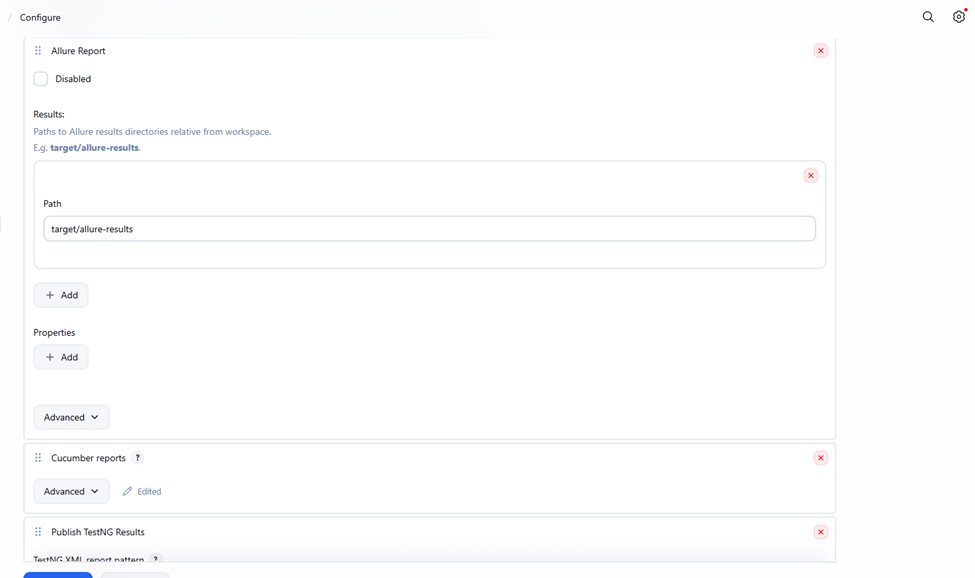
Save: Click the Save button to finalize the configuration.
Step 5: Run Cross-Browser Tests
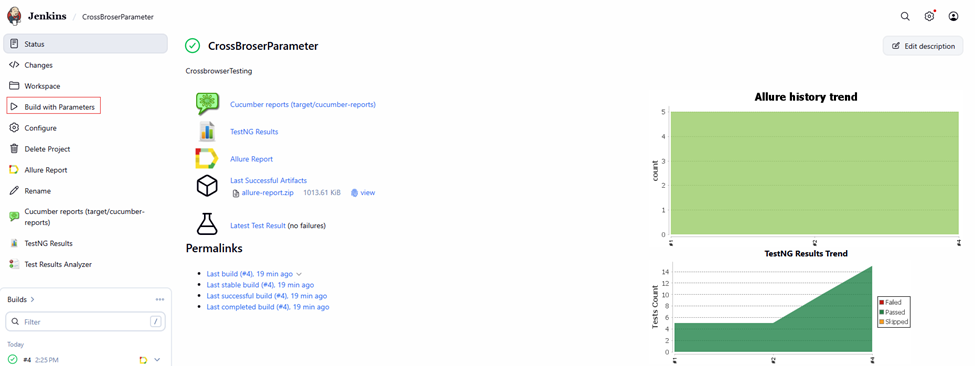
Click Build with Parameters.
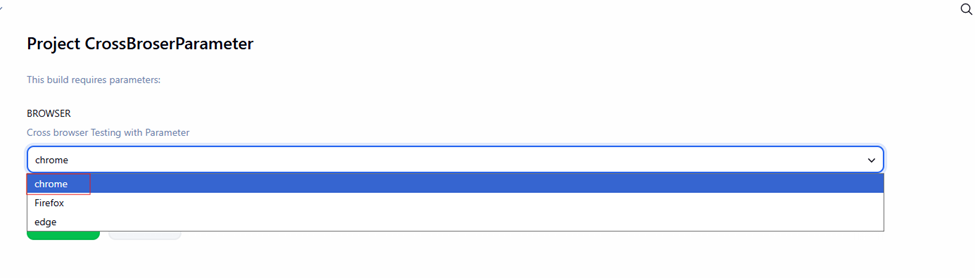
Select the desired browser from the dropdown menu.
Chrome
Firefox
Edge
Then Click the Build button to start the execution.
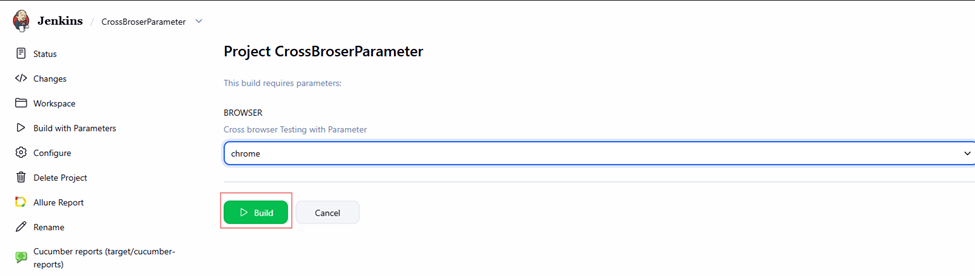
Jenkins will:
Pull latest code from GitHub
Execute tests in selected browser.
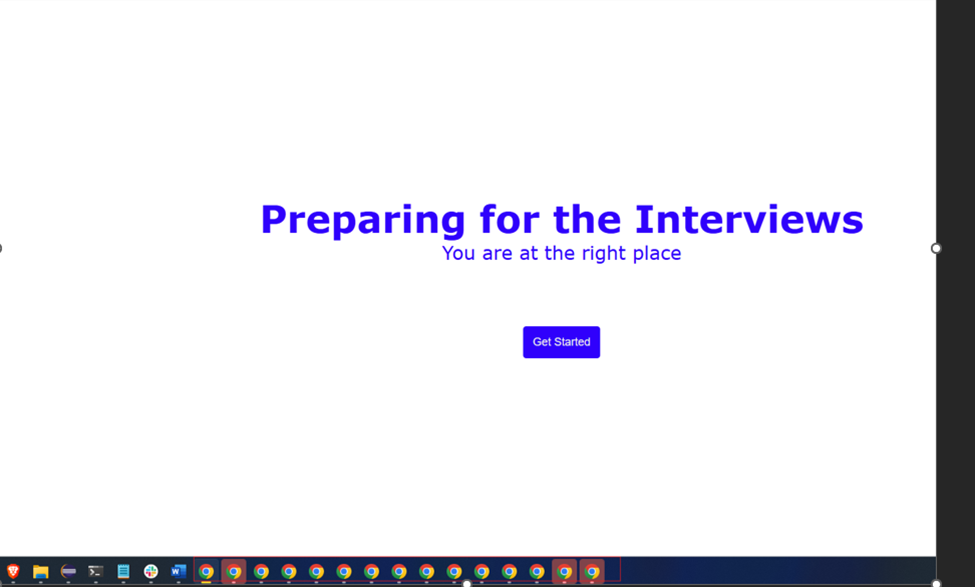
All test running in Chrome browser 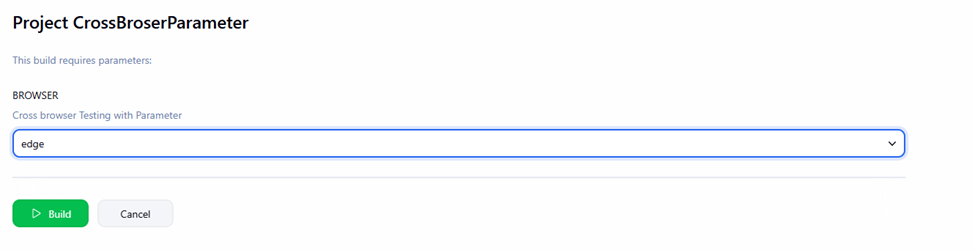
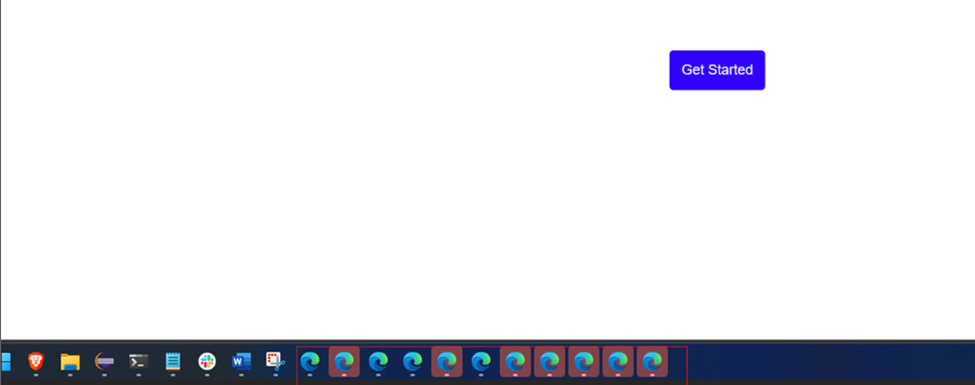
All test running in Edge browser Display console logs
Generate reports
You can repeat this for different browsers without touching the code.
Viewing and Interpreting Results
After the build:
Click Console Output
Verify which browser was launched
Review test execution logs
Check pass/fail status
If a test fails in one browser but passes in another, it highlights browser-specific compatibility issues — allowing faster debugging and resolution.
Conclusion
By configuring Jenkins build parameters for cross-browser testing, you create a flexible, scalable automation setup. This approach eliminates the need for manual browser configuration and strengthens your CI/CD pipeline.
With this setup in place, you can further enhance your automation by adding parallel execution, advanced reporting, and automated notifications.
Cross-browser automation in Jenkins ensures your application delivers a consistent experience — regardless of the browser your users choose.
Thanks for reading the blog!
Hope you found it helpful — happy learning!


