Automating Login Using Selenium with Java

Introduction
This guide demonstrates a simple login flow using username and password. In real-world applications, login processes may also include more complex steps such as two-factor authentication (2FA), CAPTCHAs, or Single Sign-On (SSO). Those require more advanced automation techniques, which we’ll touch on in future guides.
Login automation is one of the most common and practical starting points when learning Selenium WebDriver with Java. Whether you're testing a personal project or working on a real-world application, automating the login process helps save time, ensures consistency, and builds the foundation for more complex test cases.
Instead of manually entering your username and password every time, you can write a script that performs these actions for you. Selenium WebDriver is a powerful automation tool that allows you to control a browser programmatically—such as clicking buttons, entering text, and verifying content. Java, being an object-oriented and widely used language, is often chosen for building robust and scalable Selenium test frameworks.
To keep our code clean, reusable, and easy to manage, we’ll follow a design approach called the Page Object Model (POM). This technique separates the structure of the web page (like locating fields and buttons) from the test logic (such as filling out the form or clicking submit). Using POM not only improves readability but also makes future maintenance much easier.
In this guide, we’ll walk step by step through the process of creating a basic login automation script using Selenium, Java, Maven, and POM — perfect for beginners looking to get hands-on with web automation.
Step 1: Prerequisites
Before you begin, make sure the following tools are installed and ready:
Java JDK 8 or higher – Needed to compile and run Java automation scripts, It includes the Java compiler and runtime environment.
Eclipse or IntelliJ – These IDEs (Integrated Development Environments) help you write, debug, and run your code efficiently. They support Maven integration and TestNG plugins.
Maven – A project management and build automation tool used to manage dependencies (like Selenium and TestNG) and organize your test framework.
TestNG – A testing framework that allows you to create test methods, manage test cases, group tests, and generate reports.
Selenium and WebDriverManager – Selenium automates browser actions, and WebDriverManager helps you avoid manual driver setup by automatically managing browser driver binaries. Add them as dependencies in your pom.xml file
<dependencies> <dependency> <groupId>org.seleniumhq.selenium</groupId> <artifactId>selenium-java</artifactId> <version>4.10.0</version> </dependency> <dependency> <groupId>io.github.bonigarcia</groupId> <artifactId>webdrivermanager</artifactId> <version>5.5.3</version> </dependency><dependency> <groupId>org.testng</groupId> <artifactId>testng</artifactId> <version>7.10.1</version> <scope>test</scope></dependency></dependencies>Step 2: Create a New Maven Project
In Eclipse or IntelliJ:
Go to : File > New > Project > Maven > Simple Maven Project
Set your project’s identifiers:
Group Id: com.selenium.login
Artifact Id: login-automation
Step 3: Launch the Browser
Create a new class named LoginTest.java inside the src/test/java/tests package.
Now, let’s write code to launch the browser using ChromeDriver.
Note: WebDriverManager automatically downloads and matches the browser driver version to your local Chrome installation. This saves you from manually managing driver executables.
We will:
Set up the ChromeDriver
Open a new browser window
Maximize the window
Set an optional implicit wait for better element handling
package tests;import org.openqa.selenium.WebDriver;import org.openqa.selenium.chrome.ChromeDriver;import io.github.bonigarcia.wdm.WebDriverManager;import org.testng.annotations.Test;public class LoginTest { @Test public void launchBrowser() { WebDriverManager.chromedriver().setup(); // Setup ChromeDriver WebDriver driver = new ChromeDriver(); // Launch browser driver.manage().window().maximize(); // Maximize browser window driver.manage().timeouts().implicitlyWait(java.time.Duration.ofSeconds(10)); // Optional wait }}Step 4: Navigate to the Login Page
Now use Selenium WebDriver to navigate to the login page URL.
Use driver.quit() at the end of your test to close the browser and end the session cleanly.
The driver.get() command tells the browser to open a specific web address:
driver.get("https://practicetestautomation.com/practice-test-login/");Code should look like this (for step 3 and 4):
package tests;import org.openqa.selenium.WebDriver;import org.openqa.selenium.chrome.ChromeDriver;import io.github.bonigarcia.wdm.WebDriverManager;import org.testng.annotations.Test;public class LoginTest { @Test public void testLogin() { WebDriverManager.chromedriver().setup(); // Setup ChromeDriver WebDriver driver = new ChromeDriver(); // Launch browser driver.manage().window().maximize(); // Maximize window driver.manage().timeouts().implicitlyWait(java.time.Duration.ofSeconds(10)); // Optional wait driver.get("https://practicetestautomation.com/practice-test-login/"); // Close browser driver.quit(); }}Step 5: Identify Login Page Elements
We have eight different locators in Selenium WebDriver that are supported to locate the elements. They are:
id
name
className
tagName
linkText
partialLinkText
cssSelector
xpath
You can use any one of these Selenium locators to identify an element in your test script, depending on what’s available in the HTML structure.
In this example, we are using the id locator to identify the username, password, and login button fields.
Right-click on the web page and select Inspect to open browser DevTools. Use this tool to find the element locators:
Username field → id="username"
Password field → id="password"
Login button → id="submit"
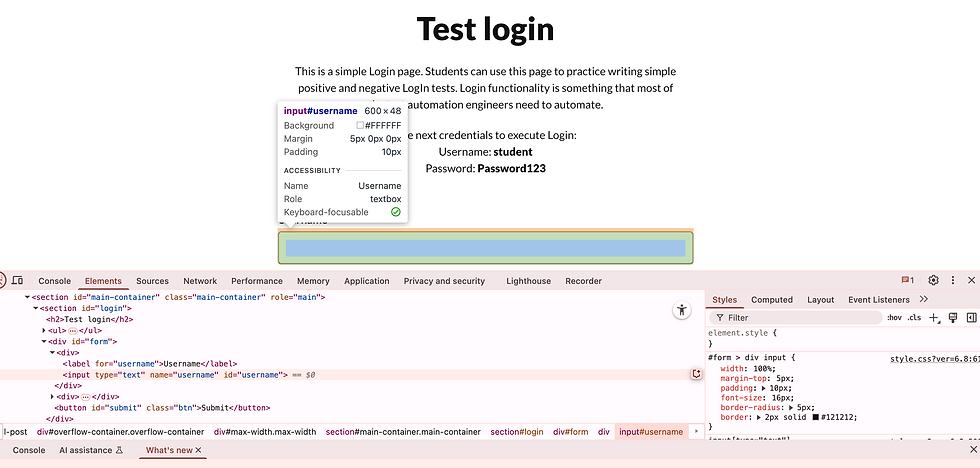
This is an example showing how to inspect the username field using browser DevTools. You can follow the same process to locate the password and login button.
Step 6: Create a Page Object Class
Create a class called LoginPage.java inside a new package named pages. This follows the Page Object Model (POM) structure.
Using POM helps avoid code duplication. If the page structure changes, you only need to update it in one place (the Page class), not in every test. inside a new package named pages. This follows the Page Object Model (POM) structure.
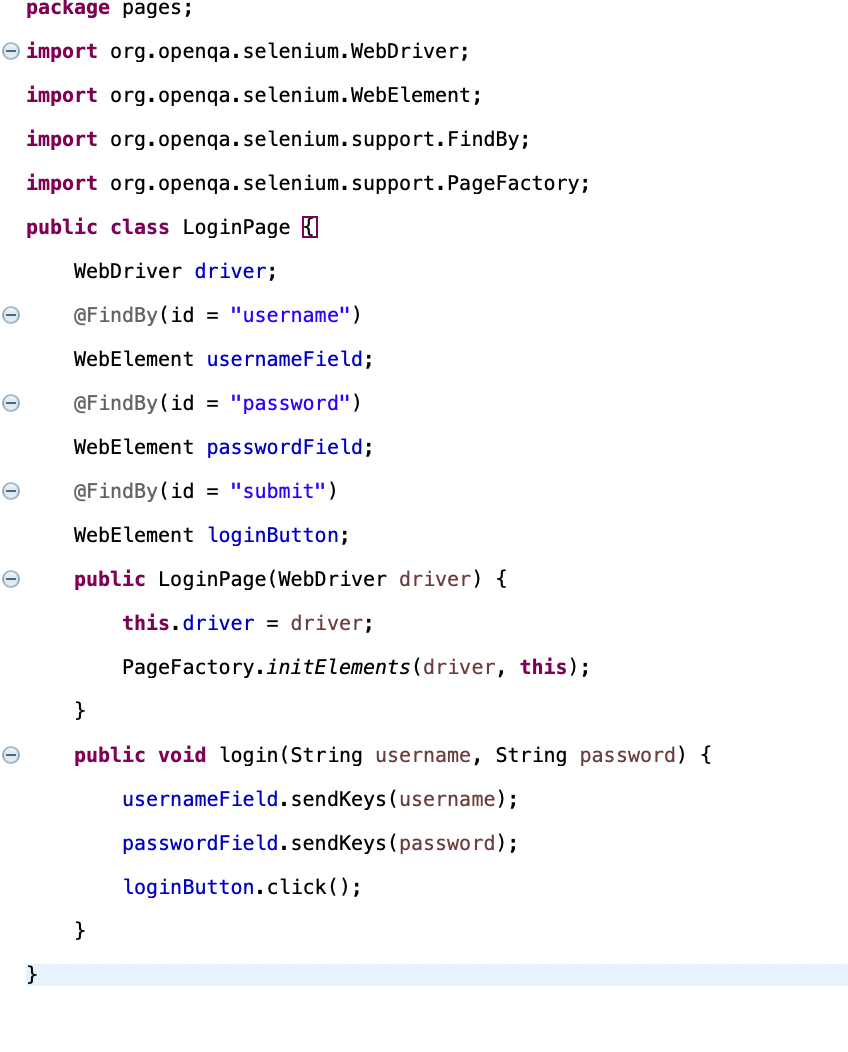
package pages;import org.openqa.selenium.WebDriver;import org.openqa.selenium.WebElement;import org.openqa.selenium.support.FindBy;import org.openqa.selenium.support.PageFactory;public class LoginPage { WebDriver driver; @FindBy(id = "username") WebElement usernameField; @FindBy(id = "password") WebElement passwordField; @FindBy(id = "submit") WebElement loginButton; public LoginPage(WebDriver driver) { this.driver = driver; PageFactory.initElements(driver, this); } public void login(String username, String password) { usernameField.sendKeys(username); passwordField.sendKeys(password); loginButton.click(); }}Step 7: Write the Complete Test Script
Update your LoginTest.java class (in the tests package) to use the LoginPage object:
package tests;import org.openqa.selenium.WebDriver;import org.openqa.selenium.chrome.ChromeDriver;import io.github.bonigarcia.wdm.WebDriverManager;import org.testng.annotations.Test;import pages.LoginPage;public class LoginTest { @Test public void testLogin() { WebDriverManager.chromedriver().setup(); WebDriver driver = new ChromeDriver(); driver.manage().window().maximize(); driver.manage().timeouts().implicitlyWait(java.time.Duration.ofSeconds(10)); driver.get("https://practicetestautomation.com/practice-test-login/"); LoginPage loginPage = new LoginPage(driver); loginPage.login("student", "Password123"); try { Thread.sleep(3000); // Just for demo } catch (InterruptedException e) { e.printStackTrace(); } driver.quit(); }}Below are screenshots of the final code for LoginTest.java and LoginPage.java for your reference.

Step 8: Run and Verify
Now that your test uses TestNG, you can run it using:
mvn test from the terminal (Maven will detect the @Test method)
Or right-click the class → Run as TestNG Test in your IDE
The browser should:
Open
Navigate to the login page
Enter the username and password
Click the Login button
Close the browser
Below is a screenshot showing how to run the test from Eclipse using Run As → TestNG Test, and the TestNG output after successful execution:

Note: Always include driver.quit() at the end of your test. This ensures the browser closes properly and the WebDriver session ends, preventing resource leaks or hanging processes.
Conclusion
In this guide, you learned how to:
Set up Selenium WebDriver with Java
Automate login flow using Page Object Model
Structure a clean basic test
Next, you can try:
Adding assertions to verify a successful login
Testing login with invalid credentials
Extending this script to automate logout or test other pages
This is the foundation of real-world Selenium automation!
If you plan to automate more complex login flows (like 2FA, SSO, or CAPTCHA handling), you’ll need additional tools and strategies such as API integrations, wait conditions, and test environment bypass options.


