API Chaining in PostMan
- praveenaaraja23
- Sep 14
- 3 min read
What is API Chaining?
API chaining means running multiple API requests one after another, where the output of one request becomes the input for the subsequent request. This allows the automation of multi-step processes involving data dependency between APIs.
Why Use API Chaining?
No manual copy-paste: Data automatically flows between requests.
Realistic testing: Simulates how your application actually behaves.
Saves time: Run the entire flow in a single click.
How API Chaining Works?
1. Send the first API request – Start by calling the initial API. This request usually provides some base information or a unique identifier that will be required in the next step.
2. Extract needed value from the response – Once you receive the response, identify and capture the key values you need, such as an User ID or Auth Token.
3. Use the extracted value in the next API request – Insert the captured value into the next API request, either in the URL, headers, or body, depending on the API’s requirements. This ensures the requests are connected and data flows smoothly from one step to another.
4. Repeat until all steps are complete – Continue this process across multiple APIs, chaining them together until you reach the final outcome. This could be creating a user, fetching their details, updating the record, and finally deleting it.
This step-by-step process connects multiple APIs, making it easy to test real workflows.
Step-by-Step: API Chaining with Go Rest API
Step 1: Create a Collection
In Postman, click on Collections.
Click the "+" button → select Blank Collection.
Give your collection a name (e.g., “GoRest API Chaining”).
Step 2: Add Requests to the Collection
Hover over the collection → click the "+" button → select Add Request.
Step 3: POST Request (Create User)
In this step, we create a new user.
Select the POST method.
Use the URL: https://gorest.co.in/public/v2/users
Add the user details (name, gender, email, status) in the request body.

Click Send → A new user is created, and the response will include a unique UserId.

Save this UserId because we’ll use it in the next steps.

Step 4: GET Request (Fetch User)
Now, we fetch the details of the user we just created.
Select the GET method.
Use the URL: https://gorest.co.in/public/v2/users/{{userId}}.
Replace {{userId}} with the ID saved from Step 3.
Click Send → This returns the full details of the created user.

Step 5: PUT Or PATCH Request (Update User)
PUT Request
Next, we update the user’s information.
Select the PUT method.
Use the URL: https://gorest.co.in/public/v2/users/{{userId}}.
Enter the updated user details in the request body.

Click Send → The user’s details are updated successfully.

PATCH Request (Update User – Partial Update)
Update only specific fields of the user.
Select the PATCH method.
Use the URL: https://gorest.co.in/public/v2/users/{{userId}}
Add only the fields you want to change (e.g., name or email or status) in the request body

Click Send → Updates only those specific fields, leaving the rest unchanged.

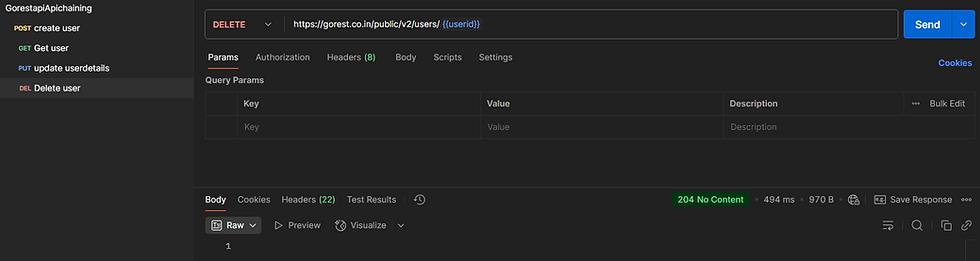
Step 6: DELETE Request (Remove User)
Select the DELETE method.
Use the URL: https://gorest.co.in/public/v2/users/{{userId}}
Click Send → The user is permanently deleted from the system.
“With these four steps, we can chain multiple API requests together in Postman. This not only saves time but also makes your testing workflow more realistic and efficient.”


